This article discusses psychoactive substances intended for adults (18+). If you have a health condition or take medication, consult a doctor before use. Our age policy
Cold Shock Shocking Technique for Mushroom Grow Kits
Definition
The cold shock shocking technique is a deliberate 12–24 hour fridge exposure (2–6 °C) applied to a fully colonised mushroom substrate to trigger pinning. According to Stamets (2000), a sharp temperature drop mimics the seasonal cue that wild Psilocybe cubensis uses to initiate fruiting.
18+ only The cold shock shocking technique is a fruiting trigger that uses a deliberate fridge exposure to push fully colonised Psilocybe cubensis substrate from vegetative mycelium into pinning. This guide is written for adult home growers who want to get reliable flushes from stalled kits — it concerns cultivation, not consumption.
What cold shocking actually does
The cold shock shocking technique is a deliberate temperature drop applied to a fully colonised mushroom substrate to trigger the shift from vegetative mycelium into fruiting. The idea comes from the ecology of Psilocybe cubensis in the wild — fruiting bodies tend to emerge after a cool, wet night follows a warm spell, so growers mimic that cue indoors. Stamets (Growing Gourmet and Medicinal Mushrooms, 2000) describes this as a "fruiting trigger" common across saprophytic cubensis-type species: a sudden drop of roughly 5–8 °C, combined with a spike in humidity and fresh air exchange (FAE), signals the mycelium that environmental conditions have changed and reproductive bodies are now worth the metabolic cost.
The cold shock shocking technique is most commonly applied to fully colonised Grow Kits and Ready-2-Grow Bags that have either stalled (no pins after 2–3 weeks at fruiting temperature) or finished their first flush and gone quiet. It is not a growth accelerator — it is a dormancy breaker. Done badly, it shocks the grain into a sulk. Done correctly, it produces a tidy pinset within 5–10 days.
When cold shocking is actually worth doing
Cold shocking is worth doing only when a fully colonised kit has stalled at fruiting temperature for at least a week with no pins. Before you touch the fridge, confirm three things: the substrate is fully colonised (no visible uncoloured grain), there is no contamination (no green trichoderma patches, no pink bacterial wet rot, no cobweb fuzz), and the kit has been held at fruiting temperature (18–23 °C) for at least 7 days without pins forming. If any of those fail, cold shocking will not help.
Situations where the technique earns its keep:
- A Grow Kit that has colonised fully but refuses to pin after 10–14 days at room temperature
- A second or third flush that has stalled between cycles
- Strains known to benefit from a stronger trigger — Mazatapec and Treasure Coast are the usual suspects, both slower to pin than a Golden Teacher
- Warm-room grows in summer where the kit never drops below 22 °C at night, removing the natural diurnal swing
Step-by-step: cold shocking a Grow Kit or R2G bag
The cold shock shocking technique follows five ordered steps: hydrate, chill, return to fruiting conditions, watch for pins, and hold steady. Each step matters, and the summary table below shows the target numbers at a glance.
| Step | Target | Duration |
|---|---|---|
| 1. Hydrate | Cold tap water, 15–18 °C room | 12 hours |
| 2. Cold expose | Household fridge, 2–6 °C | 12–24 hours |
| 3. Return to fruiting | 18–23 °C, daily FAE + mist | Ongoing |
| 4. Watch for pins | Primordia visible | Day 5–10 |
| 5. Hold steady | No second shock | Until harvest |
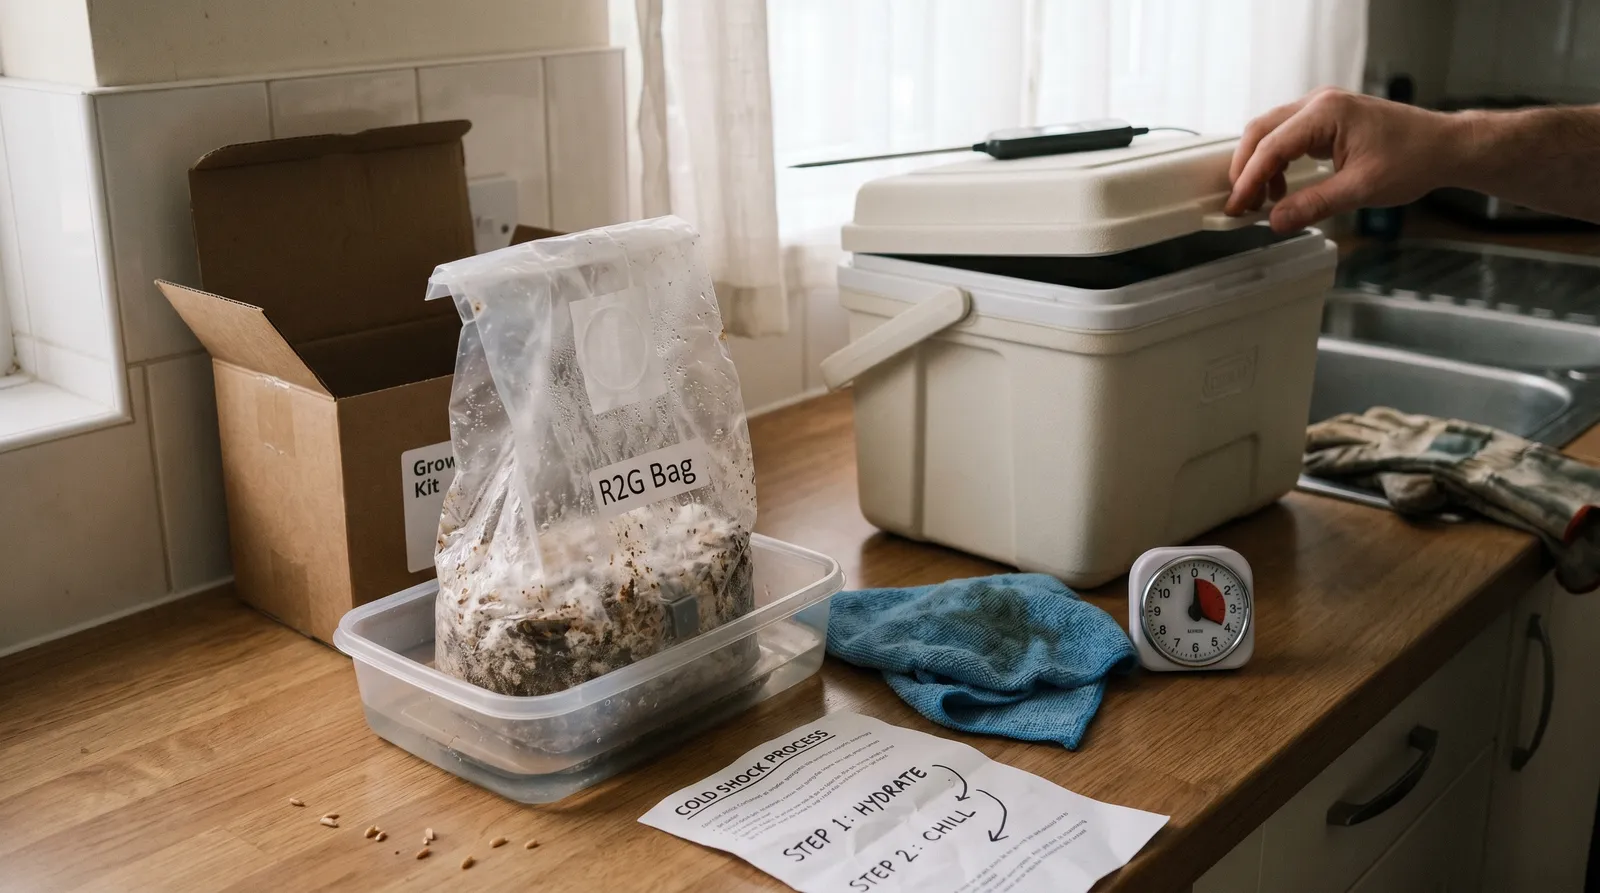
Step 1 — Hydrate before you shock
Before the cold treatment, the substrate needs water. For a standard plastic-tub Grow Kit, fill the transparent bag with cold tap water so the casing layer is submerged, seal the bag, and leave it for 12 hours in a cool room (15–18 °C). Pour the water out completely. For a Ready-2-Grow Bag, skip the dunk — the sealed format is designed as one-bag-one-flush and re-dunking risks breaching sterility. Instead, mist the inside of the bag generously so surfaces are beaded but not pooling.
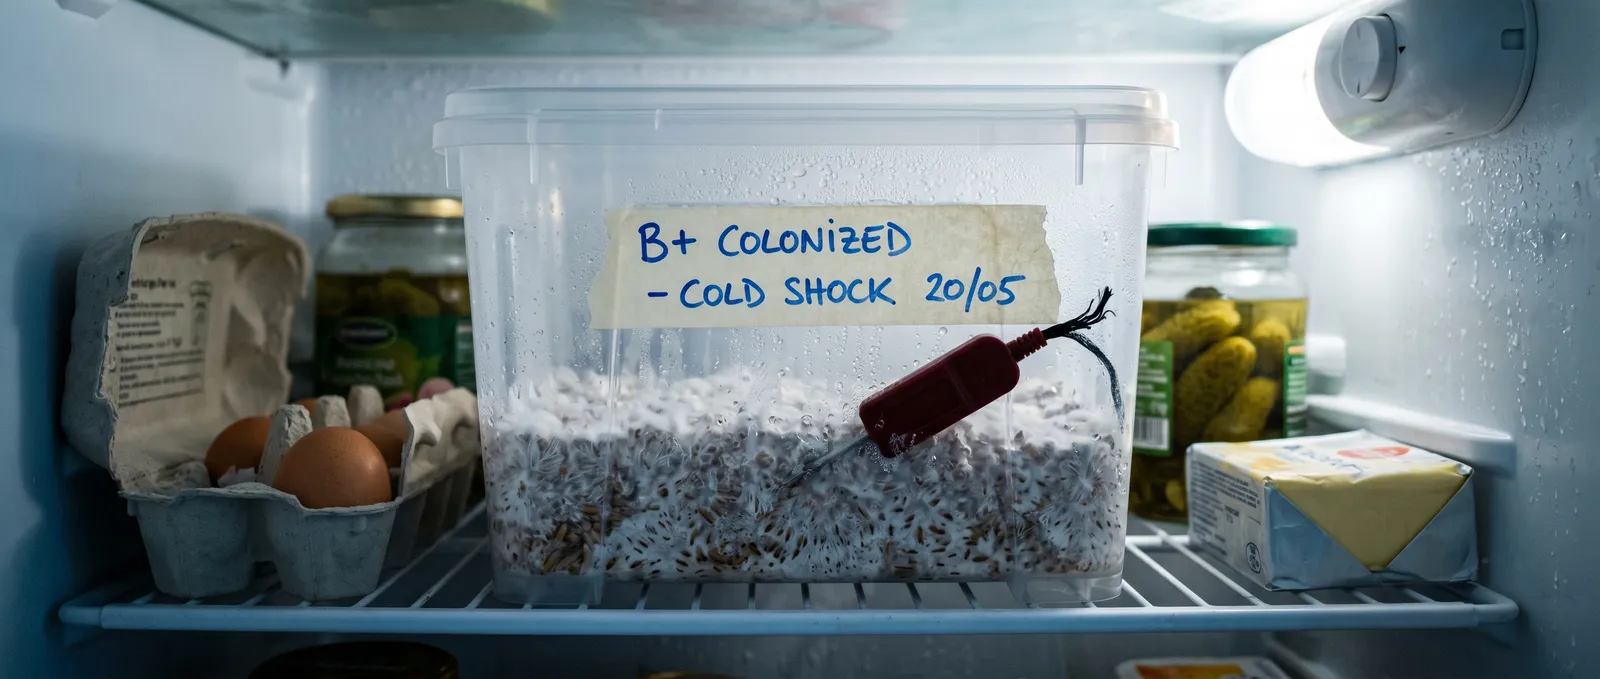
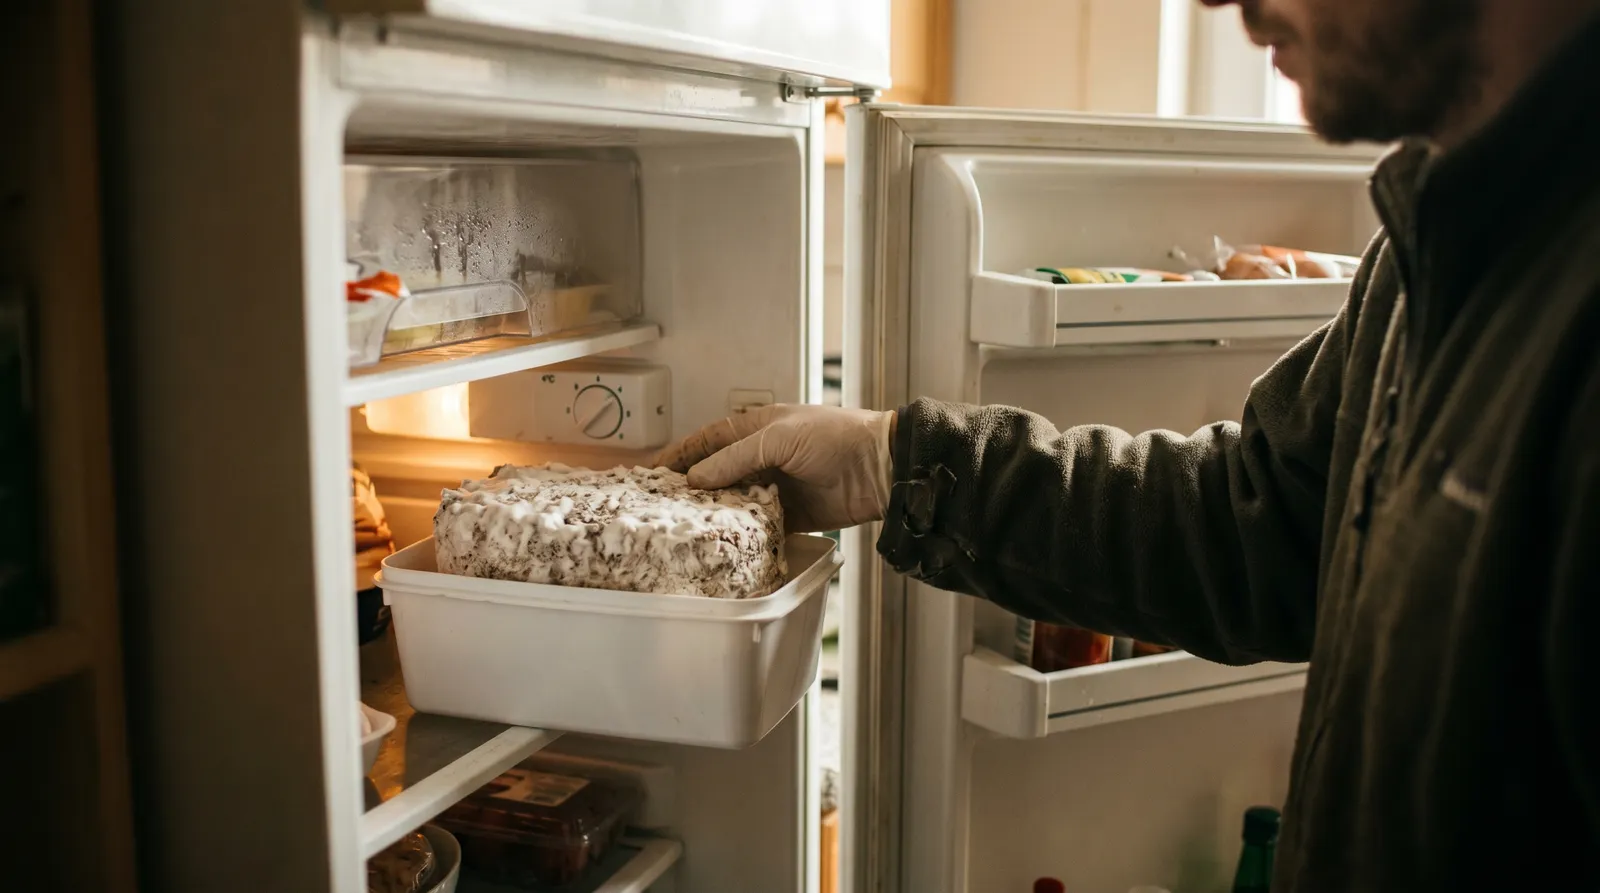
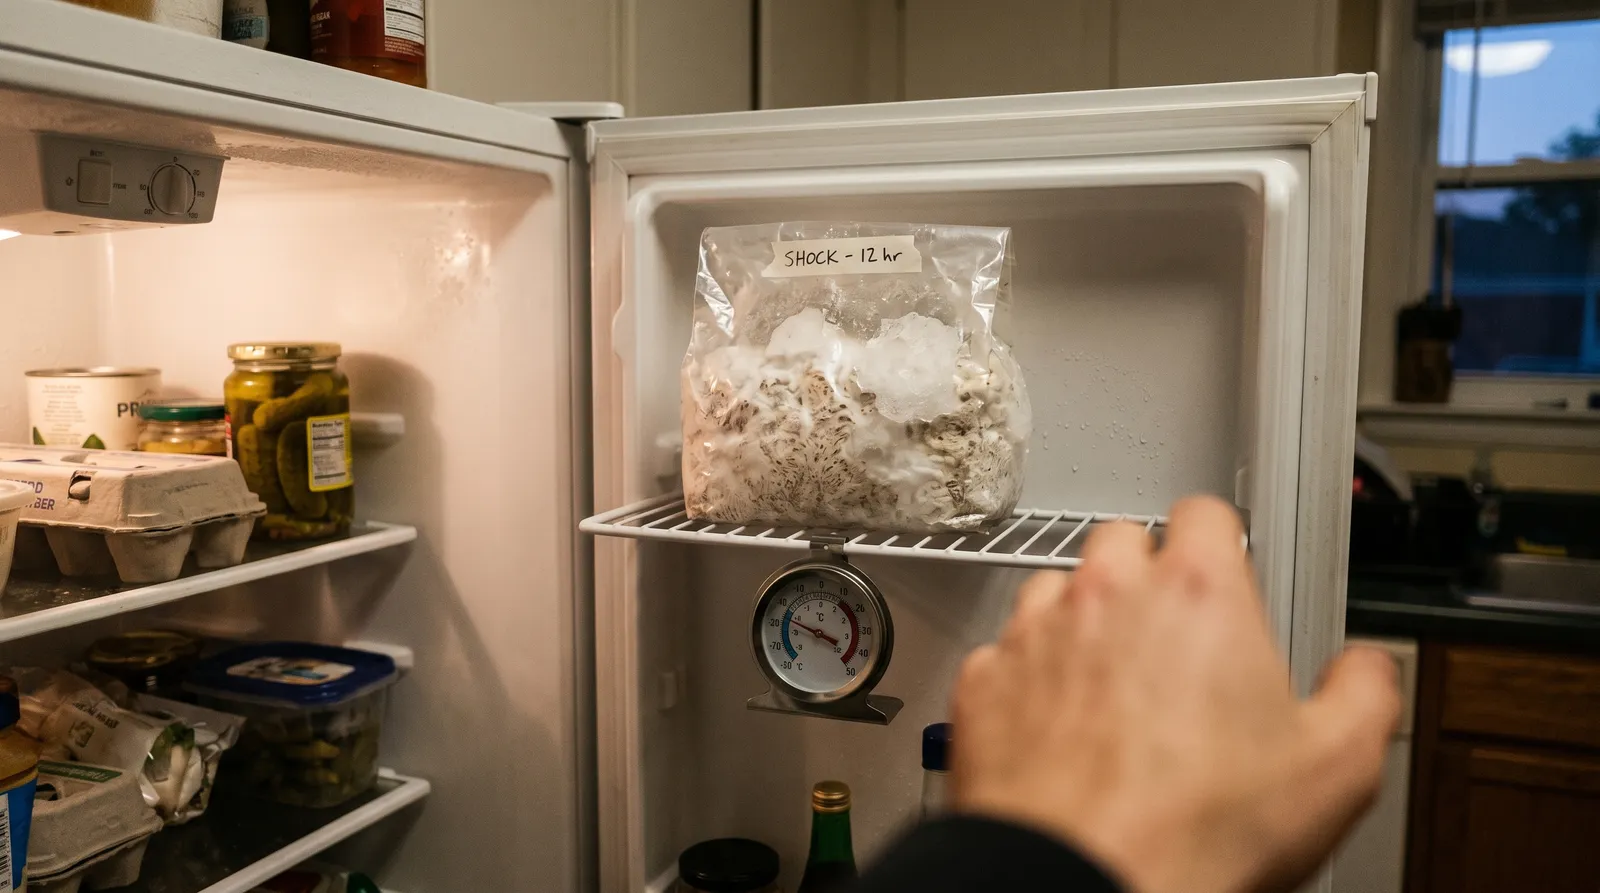
Step 2 — Cold expose for 12–24 hours
Place the kit in a household fridge at 2–6 °C. Keep it in its closed bag or with the R2G bag sealed — you want temperature shock, not a fridge-air dehydration on top. Twelve hours is enough for a simple pinning-stall; 24 hours is the upper limit for a stubborn kit or a between-flush reset. Do not freeze. Temperatures below 0 °C rupture mycelial cells and end the grow.
Step 3 — Return to fruiting conditions
Pull the kit out and place it back at 18–23 °C in its usual spot. The temperature differential itself is the signal — roughly a 15 °C swing between fridge and fruiting environment. Open the bag briefly for FAE (fresh air exchange), mist the inside walls of the bag (not the substrate directly), then reseal with paperclips leaving the air-filter unobstructed. Repeat the misting/FAE routine 1–2 times per day.
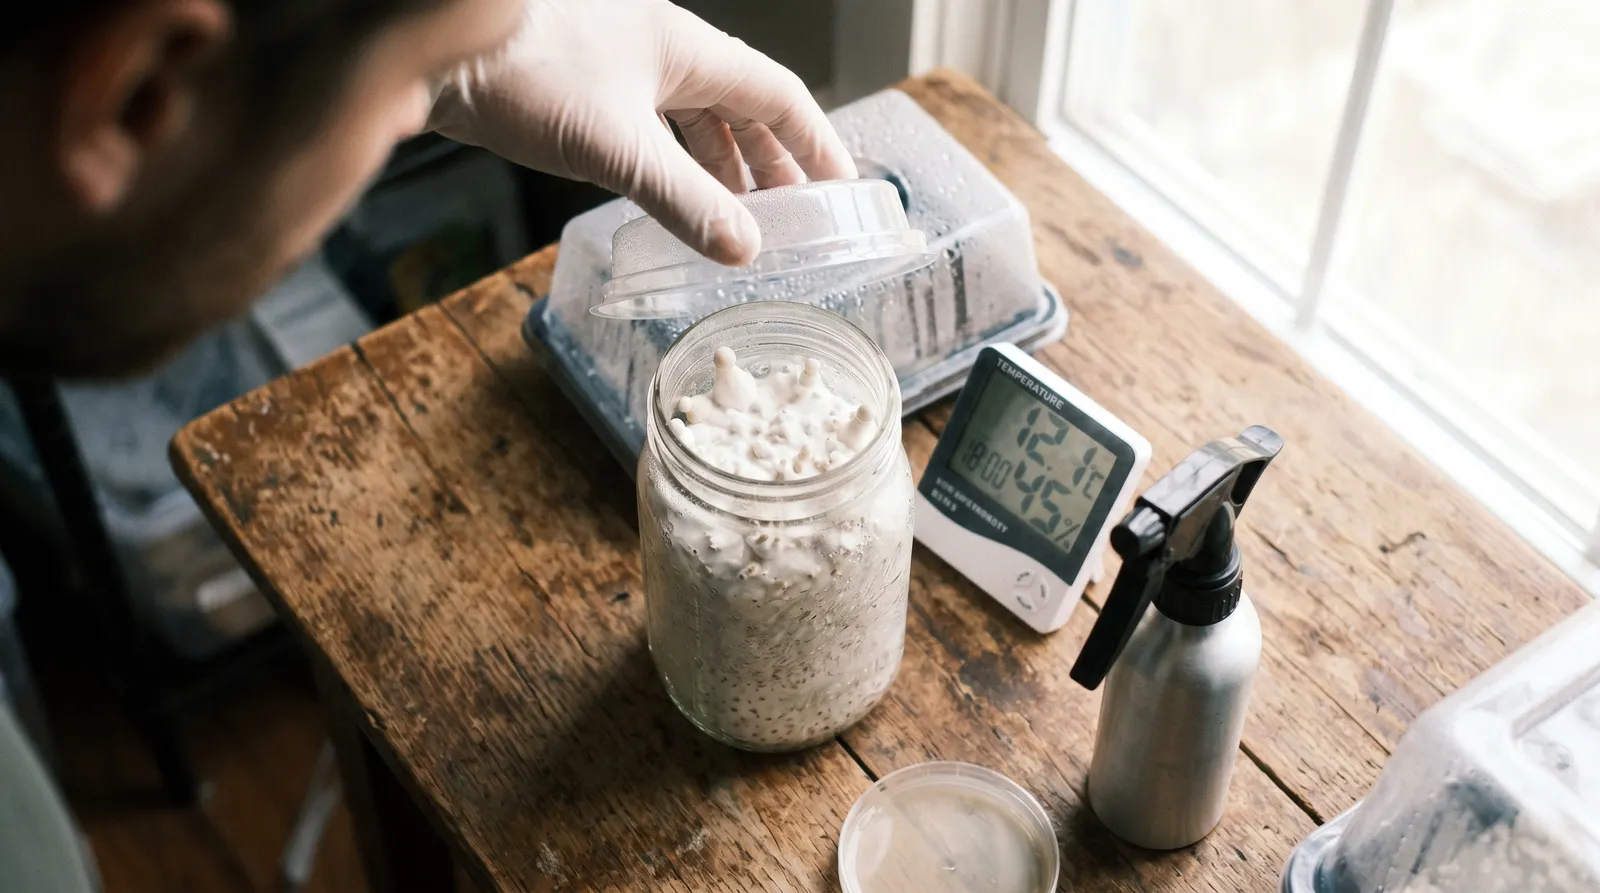
Step 4 — Watch for pins at day 5–10
Primordia (baby pins) typically appear 5–10 days after the cold treatment. They look like tiny off-white bumps, sometimes with a blueish tint where the mycelium has bruised. If nothing appears by day 14, the problem is not pinning — it is colonisation, contamination, or substrate exhaustion, and a second cold shock will not help.
Step 5 — Do not repeat cold shocking mid-flush
Once pins have appeared, hold conditions steady. A second cold shock during active fruiting aborts pins and triggers "primordia drop" — the small white bumps shrivel and the mycelium reabsorbs them. Cold shocking is a reset tool, not a daily cycle.
Common mistakes
Most cold shock failures come from four repeatable errors: freezing, shocking too early, misreading contamination, and over-hydrating sealed bags.
Freezing instead of chilling. A kitchen fridge at 2–6 °C is the target. A freezer at −18 °C or a fridge set to its coldest "meat drawer" 0 °C setting pushes the mycelium into cell rupture rather than dormancy signalling. Test your fridge with a thermometer before trusting the dial.
Cold shocking an uncolonised kit. If the substrate still has visible white-and-tan patchy patterns, the mycelium has not finished colonising grain. Cold-shocking at that stage delays colonisation by 5–7 days and gains you nothing.
Confusing slow pinning with contamination. Trichoderma (forest-green, fuzzy, appears on the casing surface or at bag seams) and cobweb mould (grey, wispy, spreads across the substrate in 24 hours) both mimic "my kit isn't doing anything" in the early stages. Cold shocking a contaminated kit just refrigerates the contamination. Toss and restart.
Over-hydrating the R2G format. Ready-2-Grow Bags are sealed all-in-one systems with their own moisture budget. Dunking them defeats the format. Misting inside the bag is the correct hydration route.
Strain-specific notes
Not every cubensis strain benefits equally from the cold shock shocking technique. Based on shop-floor feedback across the Azarius Grow Kit and Ready-2-Grow Bag ranges:

- Responds well to cold shocking: Mazatapec, Treasure Coast, PES Amazonian, Cambodia — all slower pinners that appreciate a firm environmental cue
- Usually doesn't need it: Golden Teacher, B+, McKennaii — these pin readily at 20–22 °C without intervention, so cold shocking is a fallback only if they stall
- Treat carefully: Ready-2-Grow Bag formats (APE, Enigma, Jedi Mind Fuck, Makilla Gorilla) — the sealed bag design is less tolerant of repeated opening, so if cold shocking is needed, do it once with minimal bag handling
Truffle-forming species (P. tampanensis, P. mexicana, P. atlantis) are not cold-shocked in the home-grow sense — they form sclerotia underground during substrate exhaustion, and temperature cycling during commercial cultivation follows a different protocol entirely.
The science, briefly
The temperature-drop cue is well-documented in basidiomycete fruiting biology. According to Sakamoto (2018) in Fungal Biology Reviews, cold shock in wood-rotting and soil-dwelling fungi activates specific transcription factors linked to fruiting-body morphogenesis — the mycelium reads the temperature change as a seasonal signal to reproduce. The effect size varies between species, and the published work focuses on commercial species like Lentinula edodes (shiitake) and Flammulina velutipes, so the extrapolation to P. cubensis rests on grower-community protocols (Shroomery cultivation forums, long-standing FAQ threads) rather than direct peer-reviewed cubensis trials. Honest limitation: the mechanism is plausible, the technique works in practice for most growers, and the quantitative yield-boost claims circulating online are not backed by controlled cubensis data. Compared with casing-layer tweaks or humidity adjustments, cold shocking is the single most reliable "unsticker" for a stalled kit — but it is not a magic bullet.
Related products
Cold shocking is a technique, not a product — but growers who want to buy or order a kit where the method matters most can get Grow Kits (Mazatapec, Treasure Coast, PES Amazonian, Cambodia) and Ready-2-Grow Bags from the Azarius range. Dutch customers and EU shoppers often pair these with a hygrometer and a basic mini-greenhouse for diurnal temperature control.
Disclaimer: This article is for informational and educational purposes only. It describes cultivation technique for adult home growers and does not constitute medical, cultivation, or professional advice. Mushroom cultivation outcomes vary with strain, environment, and grower experience. Always research the rules that apply in your own country or region before ordering cultivation supplies. If you have questions about personal health, consult a qualified healthcare professional.
Last updated: April 2026
Frequently Asked Questions
8 questionsHow long should a mushroom kit stay in the fridge for cold shocking?
Will cold shocking boost yields?
Can I cold shock a Ready-2-Grow Bag?
Why didn't my kit pin after cold shocking?
Which strains respond best to cold shocking?
Can I cold shock a kit that's already pinning?
Can cold shocking damage or kill the mycelium?
Do I need to soak the kit in water before cold shocking?
About this article


Adam Parsons is an external cannabis and psychedelics writer and editor who contributes to Azarius's wiki as both author and reviewer. On the writing side, he authors Azarius's kratom and kanna clusters, drawing on exten
This wiki article was drafted with AI assistance and reviewed by Adam Parsons, External contributor. Editorial oversight by Joshua Askew.
Medical disclaimer. This content is for informational purposes only and does not constitute medical advice. Consult a qualified healthcare provider before use of any substance.
Last reviewed April 25, 2026
References (2)
- [1]Stamets, P. (2000). Growing Gourmet and Medicinal Mushrooms (3rd ed.). Ten Speed Press, Berkeley, CA. Source
- [2]Kües, U., & Liu, Y. (2000). Fruiting body production in basidiomycetes. Applied Microbiology and Biotechnology, 54(2), 141-152. DOI: 10.1007/s002530000396