DynaKit Basic
Vape accessories
by DynaVap
DynaKit Basic: The DynaVap Maintenance Kit That Keeps Your Vape Running Properly
The DynaKit Basic is a complete maintenance and replacement parts kit for DynaVap vaporizers, packed with screens, O-rings, wax, storage tubes, and a fat mouthpiece. If you've been using your DynaVap daily and the draw feels off, the cap wobbles, or the O-rings look flattened — this one box sorts it all out in about five minutes.
What's Inside the DynaKit Basic
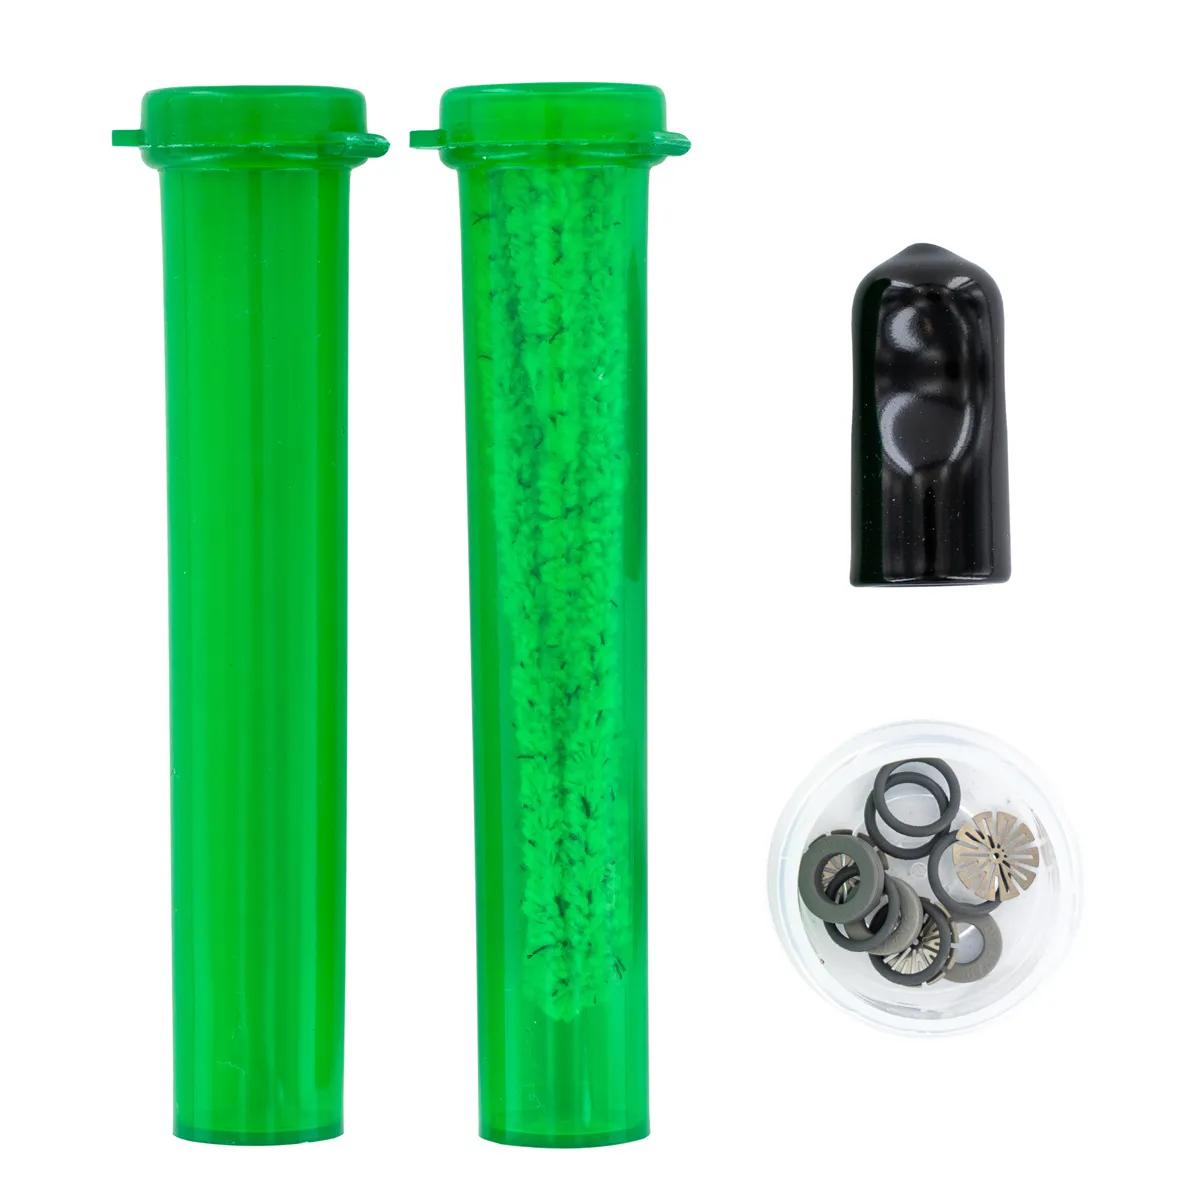
The DynaKit Basic includes every consumable part your DynaVap will eventually need. Here's the full breakdown:
| Item | Quantity | Purpose |
|---|---|---|
| Stainless Steel CCD Screens | 3 | Filter fine particles without restricting airflow |
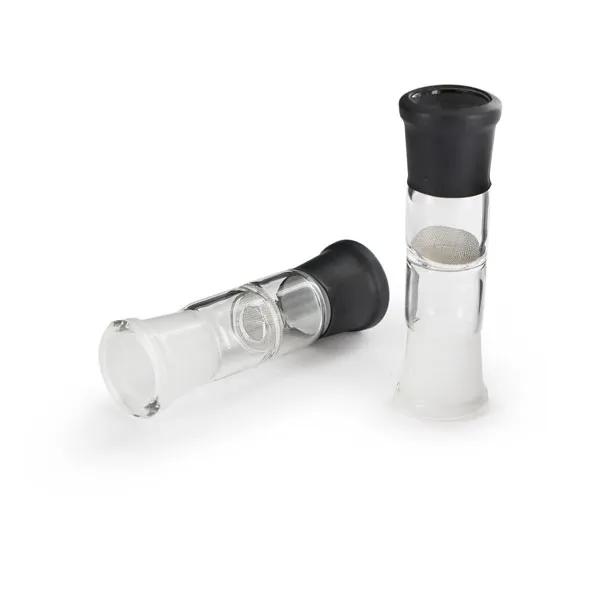
| Fat Mouthpiece | 1 | Adapts any DynaVap to a 14 mm water piece joint |
| Condenser O-Rings | 3 | Full condenser ring replacement for any DynaVap |
| High-Temp O-Rings | 5 | Complete replacement set for any DynaVap tip |
| DynaWax | 1 | Lubricates O-rings and preserves wooden components |
| Plastic Storage Tubes | 2 | Store and transport any standard-length DynaVap |
That's 14 individual parts plus the wax. Enough to fully refresh one DynaVap and still have spares left for next time.
Why Your DynaVap Needs a Refresh Kit
O-rings are the first thing to go on any DynaVap — and when they do, you'll notice immediately. A worn condenser O-ring means air leaks around the stem, so you end up pulling harder for less vapour. Flattened tip O-rings let the cap sit loose, which throws off the click timing and can lead to uneven heating or accidental combustion. Neither situation is great.
We've seen customers come in thinking their DynaVap is broken when it's actually just a 50p O-ring that's lost its seal. The CCD screens clog up over time too — residue builds between the perforations and chokes the airflow. Swapping in a fresh screen is the single quickest way to bring a tired DynaVap back to life. Three screens in this kit means you can rotate them while cleaning, or just replace outright every few weeks if you're a heavy user.
The DynaWax is the bit most people skip and shouldn't. A thin coat on your O-rings before installation stops them cracking from heat cycling. If you've got a VonG or any DynaVap with a wooden sleeve, the wax conditions the wood and stops it drying out. One tin lasts months — you only need a fingertip's worth each time.
DynaKit Basic Specifications
| Spec | Value |
|---|---|
| Brand | DynaVap |
| SKU | VS0450 |
| Compatible Models | B Series, M Series, VonG, VonG (i), all standard DynaVap devices |
| Screen Material | Stainless steel |
| Total O-Rings | 8 (3 condenser + 5 high-temp tip) |
| Mouthpiece Fit | 14 mm female water piece joint |
| Storage Tube Length | Standard DynaVap length |
| Total Parts Count | 14 + DynaWax |
Running the DynaKit Basic through a water piece? The Fat Mouthpiece included here fits 14 mm joints, but if you're after a dedicated glass setup, pair this with a DynaVap-compatible bubbler for smoother, cooler draws. Already sorted on parts and want to upgrade the heating side? The DynaVap Induction Heater removes the torch entirely and gives you consistent clicks every time.
How to Refresh Your DynaVap with the DynaKit Basic
- Disassemble your DynaVap completely — remove the cap, tip, CCD screen, condenser, and mouthpiece. If parts are stuck, a gentle twist while pulling usually frees them. Don't force anything.
- Soak the metal components (tip, condenser, cap, old screen) in isopropyl alcohol for 10–15 minutes. Use the pipe cleaners from your cleaning supplies to scrub the condenser tube inside and out.
- Remove all old O-rings from the condenser and tip. They may be stuck — roll them off gently rather than cutting, to avoid scratching the metal.
- Apply a thin layer of DynaWax to each new O-ring before installation. This makes seating easier and extends the ring's lifespan significantly.
- Slide 3 new condenser O-rings onto the condenser at their correct positions. Press 5 new high-temp O-rings onto the tip grooves.
- Drop a fresh stainless steel CCD screen into the tip. The screen sits concave-side down — press it in with the back of a pen or the DynaVap cap.
- Reassemble: tip into the body, condenser through the stem, mouthpiece on the end. Give it a test draw before heating — you should feel firm, even resistance with no air leaks.
- If you have wooden components (VonG sleeve, for example), rub a small amount of DynaWax into the wood with your fingers. Let it absorb for a minute, then buff off the excess.