This article discusses psychoactive substances intended for adults (18+). If you have a health condition or take medication, consult a doctor before use. Our age policy
PF Tek: Beginner's Guide to Brown Rice Flour Cultivation
Definition
PF Tek is the brown rice flour and vermiculite jar cultivation method published by Robert McPherson in 1991 and still taught as the entry-level home protocol for Psilocybe cubensis. Stamets (2000) lists it as the cheapest reliable technique for first-time growers, yielding roughly 15–30g dry per jar across 2–3 flushes.
18+ only PF Tek is a home cultivation method that lets first-time growers produce Psilocybe cubensis mushrooms from brown rice flour and vermiculite jars on a kitchen table. This guide is written for adults and covers a mycology technique with a 30-year pedigree.
What is PF Tek?
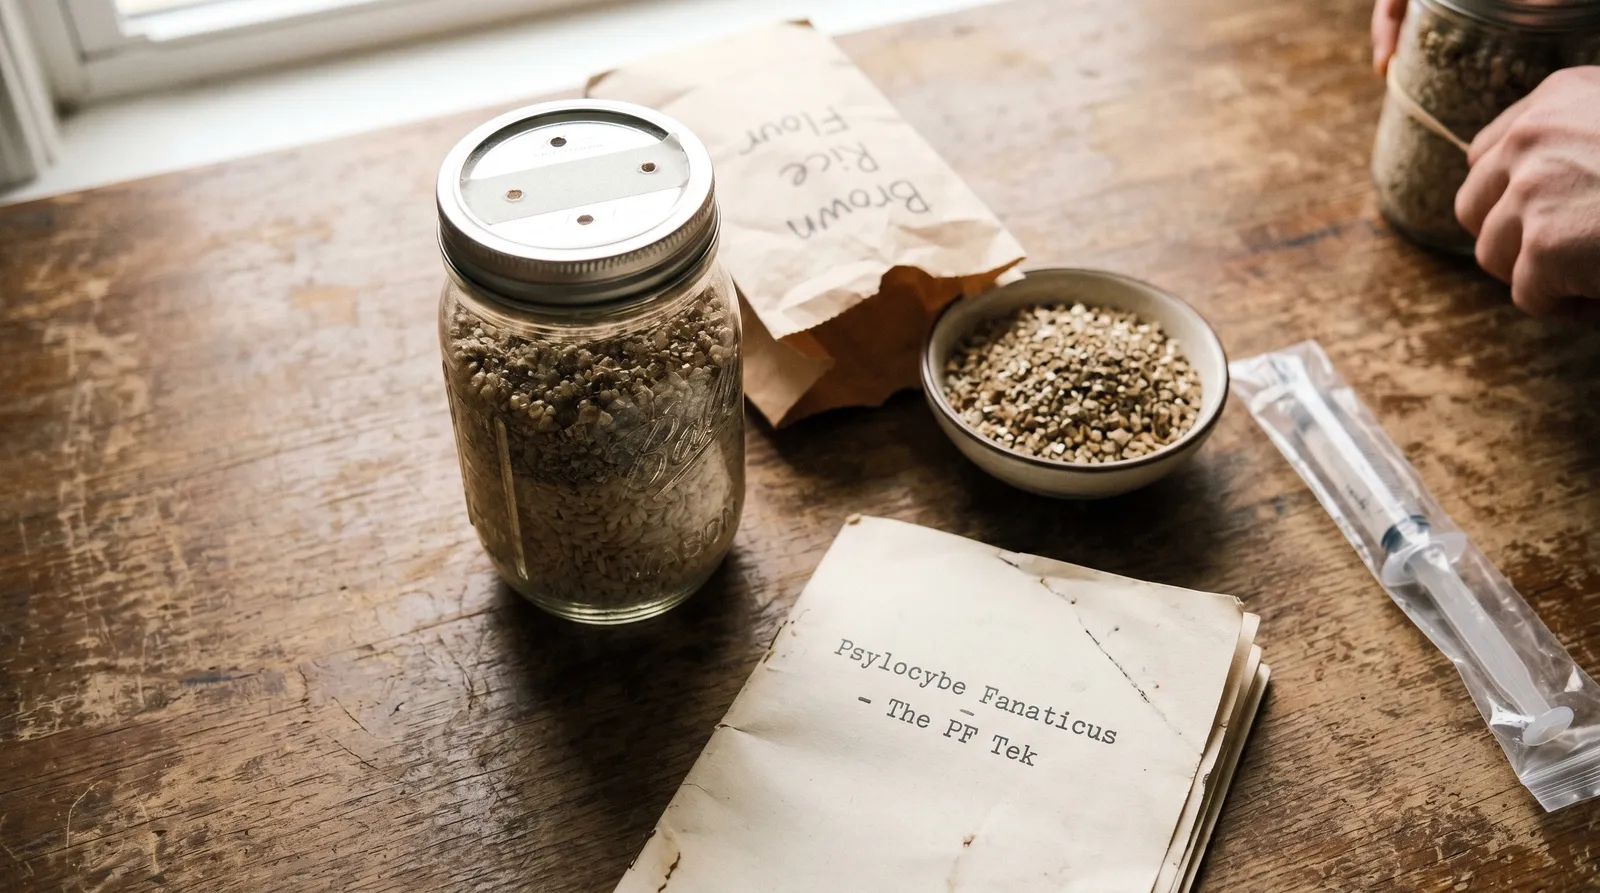
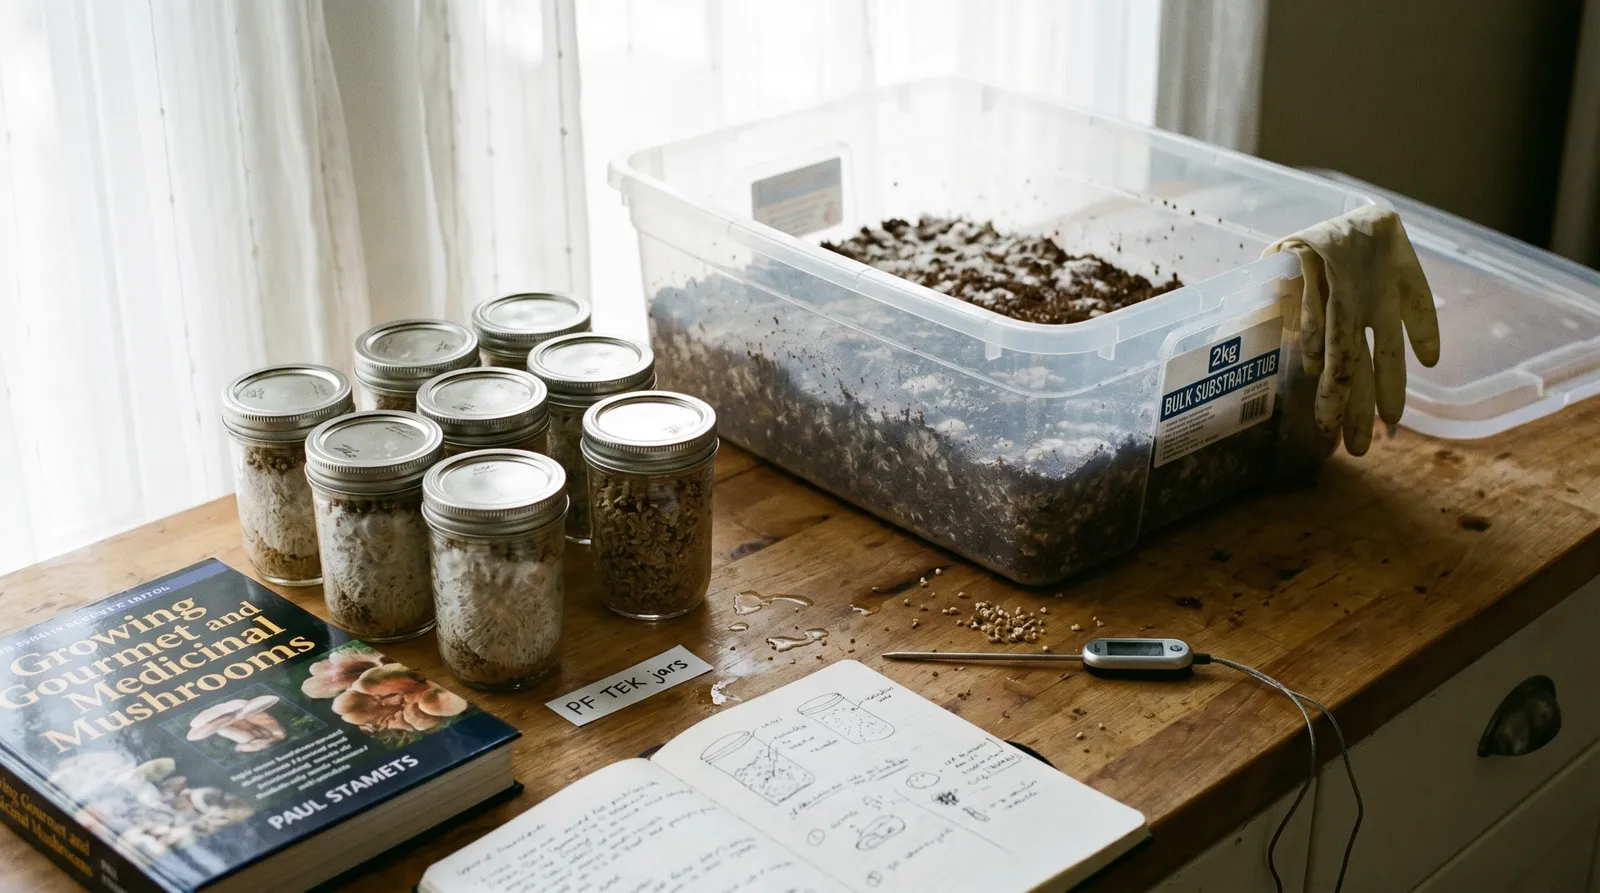
PF Tek is the brown rice flour and vermiculite cultivation method published anonymously by Robert McPherson (under the alias Psylocybe Fanaticus) in 1991, and formally documented in his 1995 zine. It's the entry-level protocol most home cultivators learn first: cheap ingredients you can buy from a supermarket and a garden centre, half-pint jars, a still-air box, and a fruiting chamber built from a plastic storage tub. McPherson's innovation wasn't the substrate — grain and vermiculite were both already known — it was the ratio (2:1:1 vermiculite/brown rice flour/water) and the dry vermiculite top-layer acting as a contamination barrier.
Three things to know up front. One: this technique is a Psilocybe cubensis method — it works on other cubensis-compatible species but was designed around cubensis physiology (fruiting temp 23–26°C, 90%+ humidity during pinning). Two: it produces modest yields compared to bulk grain-to-straw setups — expect 15–30g dry per 250ml jar across 2–3 flushes, according to the figures Stamets reports in Growing Gourmet and Medicinal Mushrooms (2000). Three: contamination tolerance is the whole selling point. The dry vermiculite cap means a sneeze near an open jar is survivable in a way it isn't with exposed grain spawn.
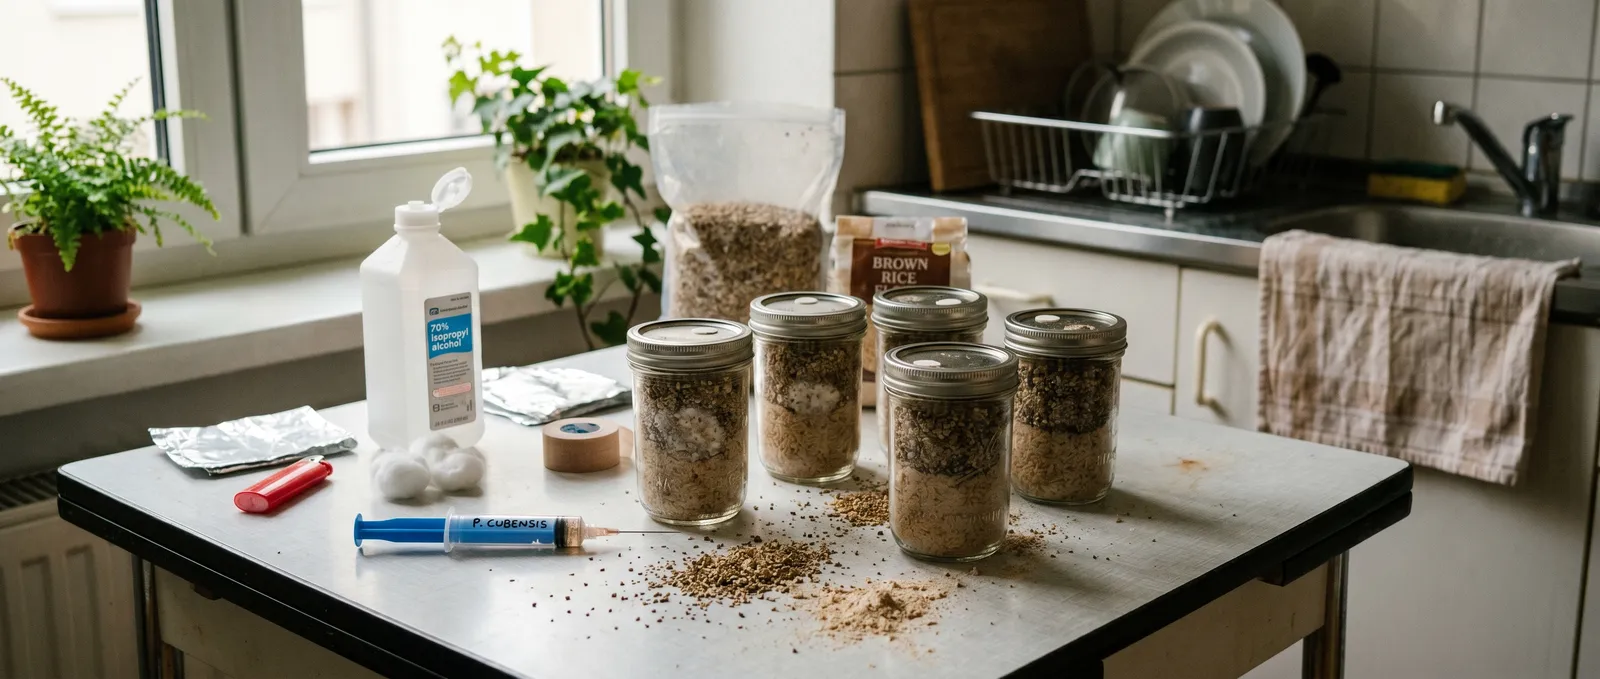
Step 1 — Gather your materials
Everything on the PF Tek shopping list fits on a kitchen table and has barely changed since 1995.
- Substrate: organic brown rice flour (BRF) and coarse-grade vermiculite (horticultural, not the fine-dust stuff). Ratio: 2 parts vermiculite, 1 part BRF, 1 part water by volume.
- Jars: half-pint (240ml) wide-mouth canning jars with two-piece metal lids. Drill four 3–4mm holes in each lid in a square pattern for spore syringe injection.
- Spore syringe: 10ml syringe loaded with viable spores of your chosen cubensis strain. One syringe inoculates 8–12 jars.
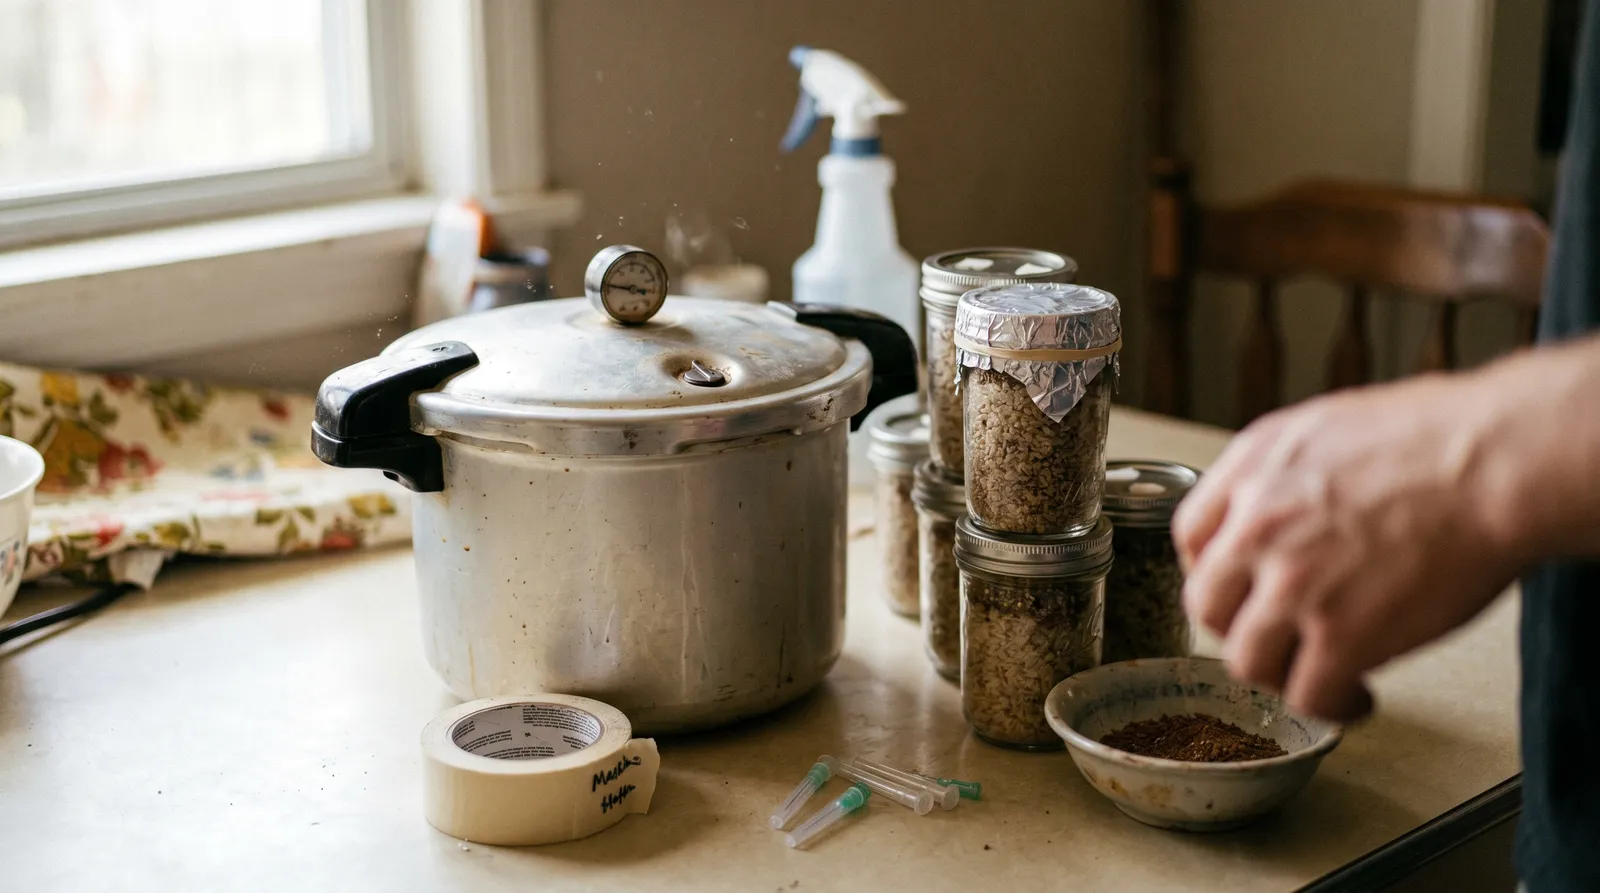
- Pressure cooker or large stockpot with rack for steam sterilisation.
- Fruiting chamber: a clear plastic storage tub (around 40L), drilled with 6mm holes every 5cm on all six faces for passive fresh air exchange — this is the "shotgun fruiting chamber" or SGFC.
- Perlite: 4–6L soaked in water, drained to field capacity, placed in the base of the chamber for humidity.
- Still air box (SAB): another clear tub flipped upside-down with two armholes cut in the long side. The poor man's laminar flow hood.
- Isopropyl alcohol (70%), nitrile gloves, a torch lighter, micropore tape.
| Stage | Duration | Target temperature | Key action |
|---|---|---|---|
| Sterilisation | 60 min + 6–8h cool | 121°C (15 psi) | Pressure cook jars |
| Inoculation | 10 min per batch | Room temp | Inject 0.5–1ml per hole |
| Colonisation | 3–5 weeks | 23–26°C, dark | Do not disturb |
| Consolidation | 7–10 days | 23–26°C, dark | Wait for density |
| Dunk & roll | 12–24 hours | 4–10°C water | Cold shock substrate |
| Fruiting | 5–10 days to pins | 22–24°C, 90%+ RH | Mist and fan twice daily |
Step 2 — Mix and load the jars
Mixing PF Tek substrate starts with combining two volumes vermiculite and one volume water in a clean bowl. Stir until the vermiculite is uniformly damp but no water pools at the bottom when you tilt the bowl — this is "field capacity." Add one volume BRF and fold it through with a fork. Don't compress it. The mix should feel like damp breadcrumbs, not oatmeal.
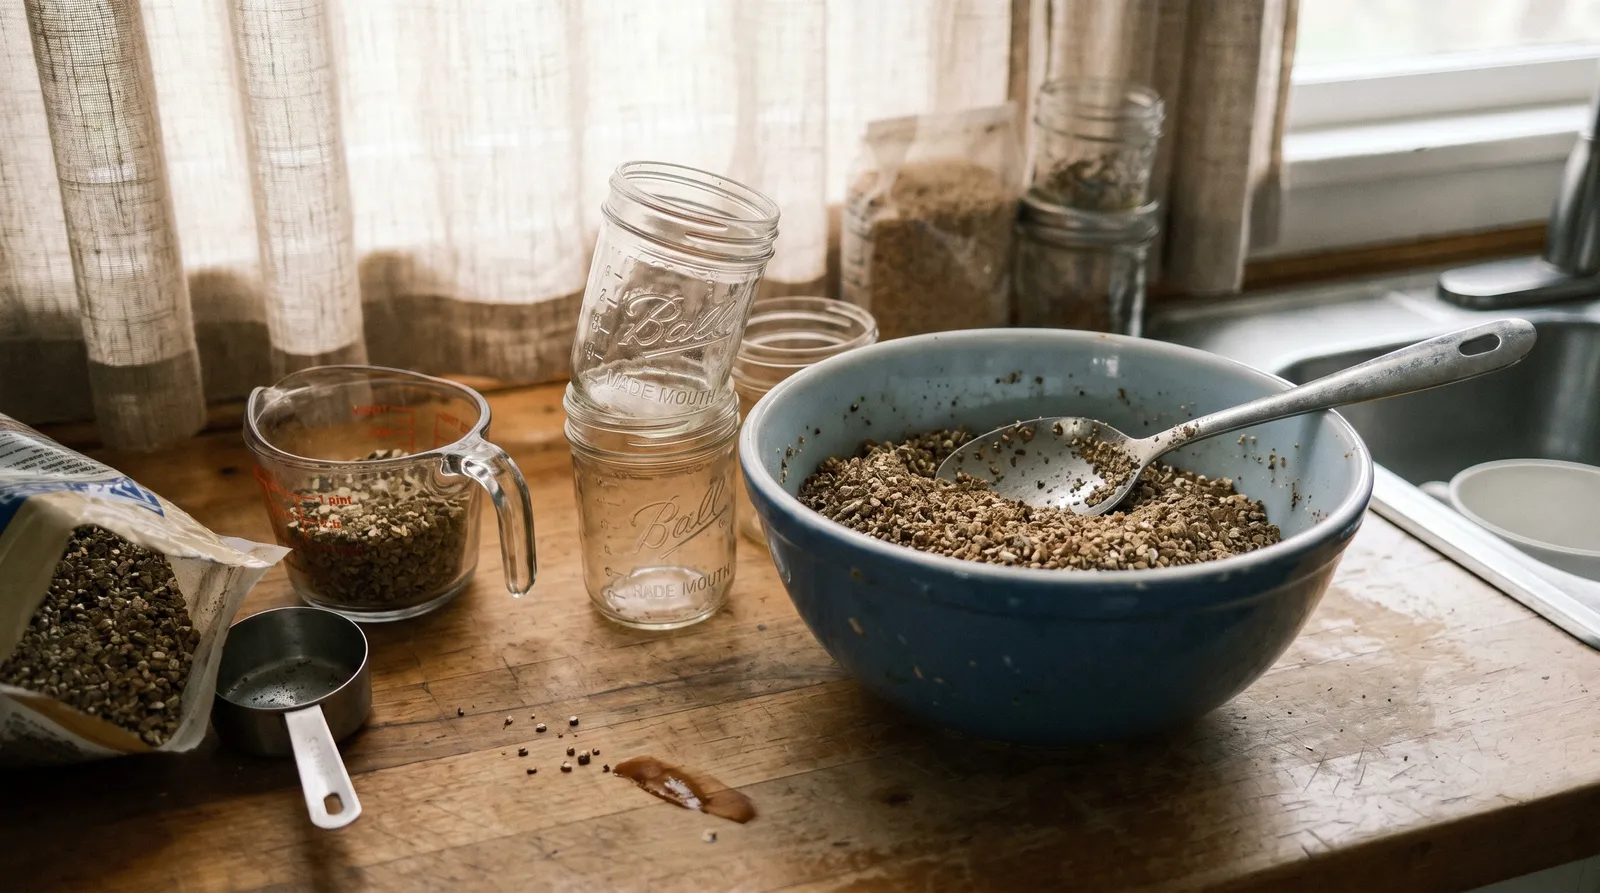
Spoon (don't pack) the substrate into each jar to about 2cm below the rim. Wipe the inside walls clean above the substrate line — any stray BRF stuck to glass above the fill becomes a mould launchpad. Top each jar with a 1cm layer of dry vermiculite. This is the contamination barrier McPherson's method hinges on.
Screw the lids on finger-tight and cover the lid tops with a square of tinfoil to stop water dripping into the injection holes during sterilisation.
Step 3 — Sterilise
Sterilisation means pressure cooking at 15 psi for 60 minutes, or steam-sterilising in a stockpot (jars standing in 5cm of water, lid on, gentle simmer) for 90 minutes. Let the cooker depressurise and cool naturally — cracking it open pulls the lids in and can crack jars. The whole cool-down takes 6–8 hours; most growers sterilise overnight.
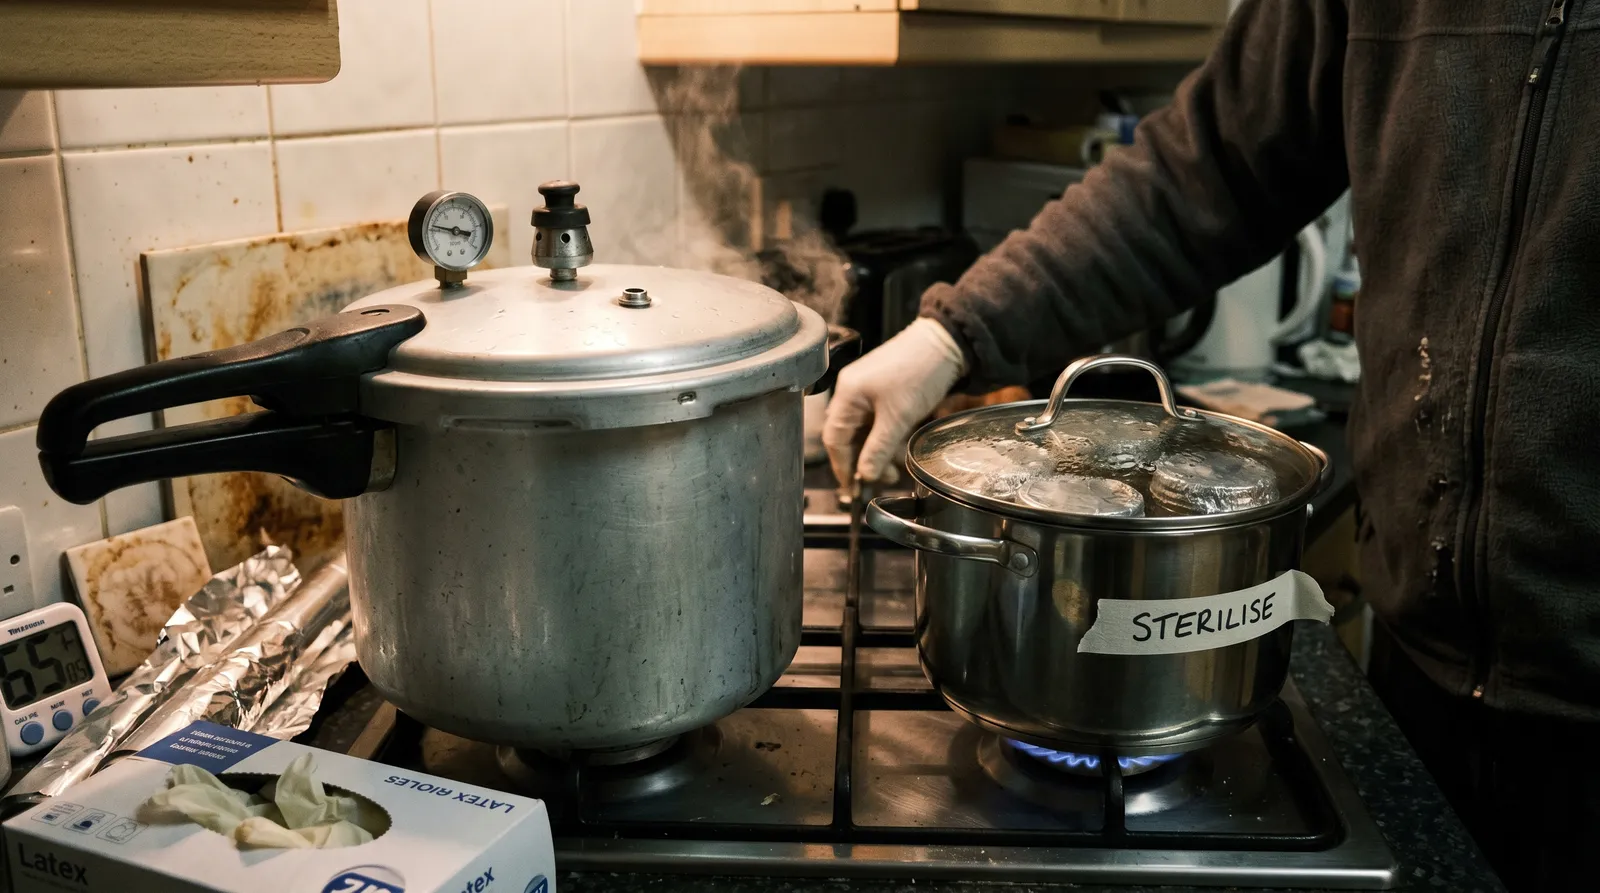
Sterilisation is the non-negotiable step. Shroomery's long-running protocol thread for this method (updated 2019) lists inadequate sterilisation as the single most common cause of jar contamination in the first 10 days post-inoculation — typically showing as green Trichoderma colonies or wet grey bacterial slime around the substrate edges.
Step 4 — Inoculate
Inoculation happens inside the still-air box. Wipe every surface, the outside of the jars, and your gloved hands with 70% isopropyl. Flame the syringe needle with a lighter until glowing, let it cool 10 seconds, then inject 0.5–1ml of spore solution through each of the four lid holes, angling the needle down against the glass so drops run down the inside wall. Cover the four holes with a square of micropore tape after injecting.

Store the inoculated jars at 23–26°C, in the dark, somewhere stable. An airing cupboard or a shelf above a fridge usually works. Do not disturb them.
Step 5 — Watch for colonisation
Colonisation shows as white rhizomorphic mycelium at each injection site within 5–10 days. Full colonisation — white fluff through the entire jar — takes 3–5 weeks, strain-dependent. Faster strains (B+, Golden Teacher, Mazatapec) hit full colonisation around day 21. Slower strains (PES Amazonian, Treasure Coast) can need 35–40 days.
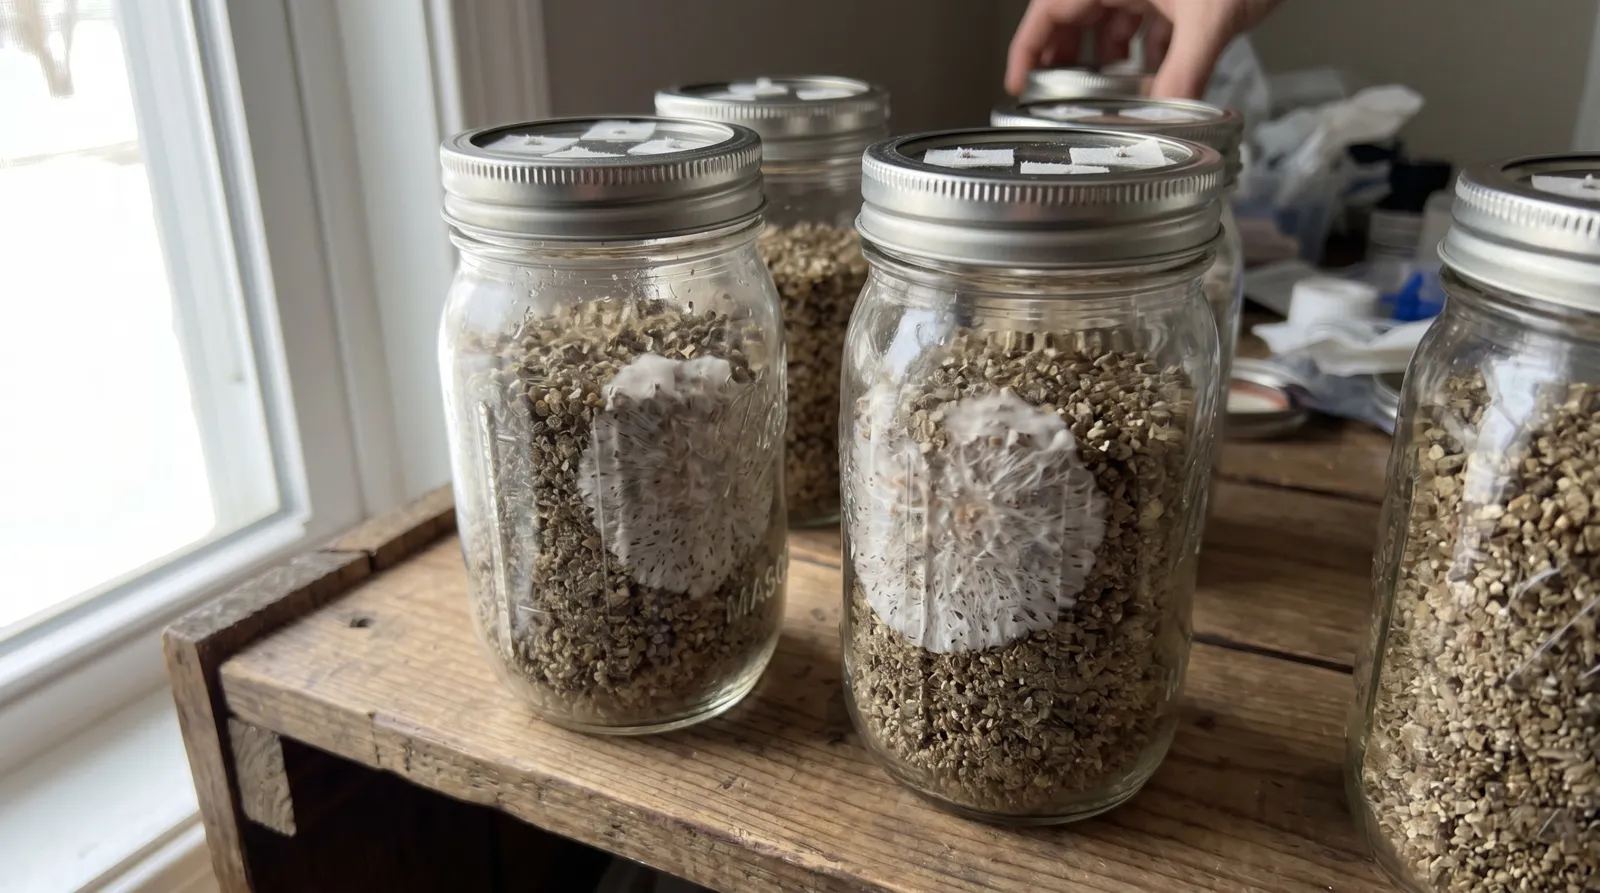
Once fully white, give the jars another 7–10 days of "consolidation" — the mycelium stops looking wispy and turns dense. Small bluish bruises and the first brown patches of primordia (pre-pins) on the side walls signal readiness to fruit.
Contamination red flags
- Green or blue-green patches on the substrate surface — Trichoderma. Bin the jar, don't open it indoors.
- Fluffy pale grey/charcoal web spreading fast across white mycelium — cobweb mould. Sometimes recoverable with immediate drying, usually not.
- Wet, slimy, sour-smelling patches — bacterial rot, often from over-hydrated substrate. Bin immediately.
- Pink, orange, or yellow spots — bacterial or Neurospora. Bin.
Yellow metabolites (liquid droplets from healthy mycelium) are not the same as yellow contamination — they sit in small beads, don't spread, and don't smell sour.
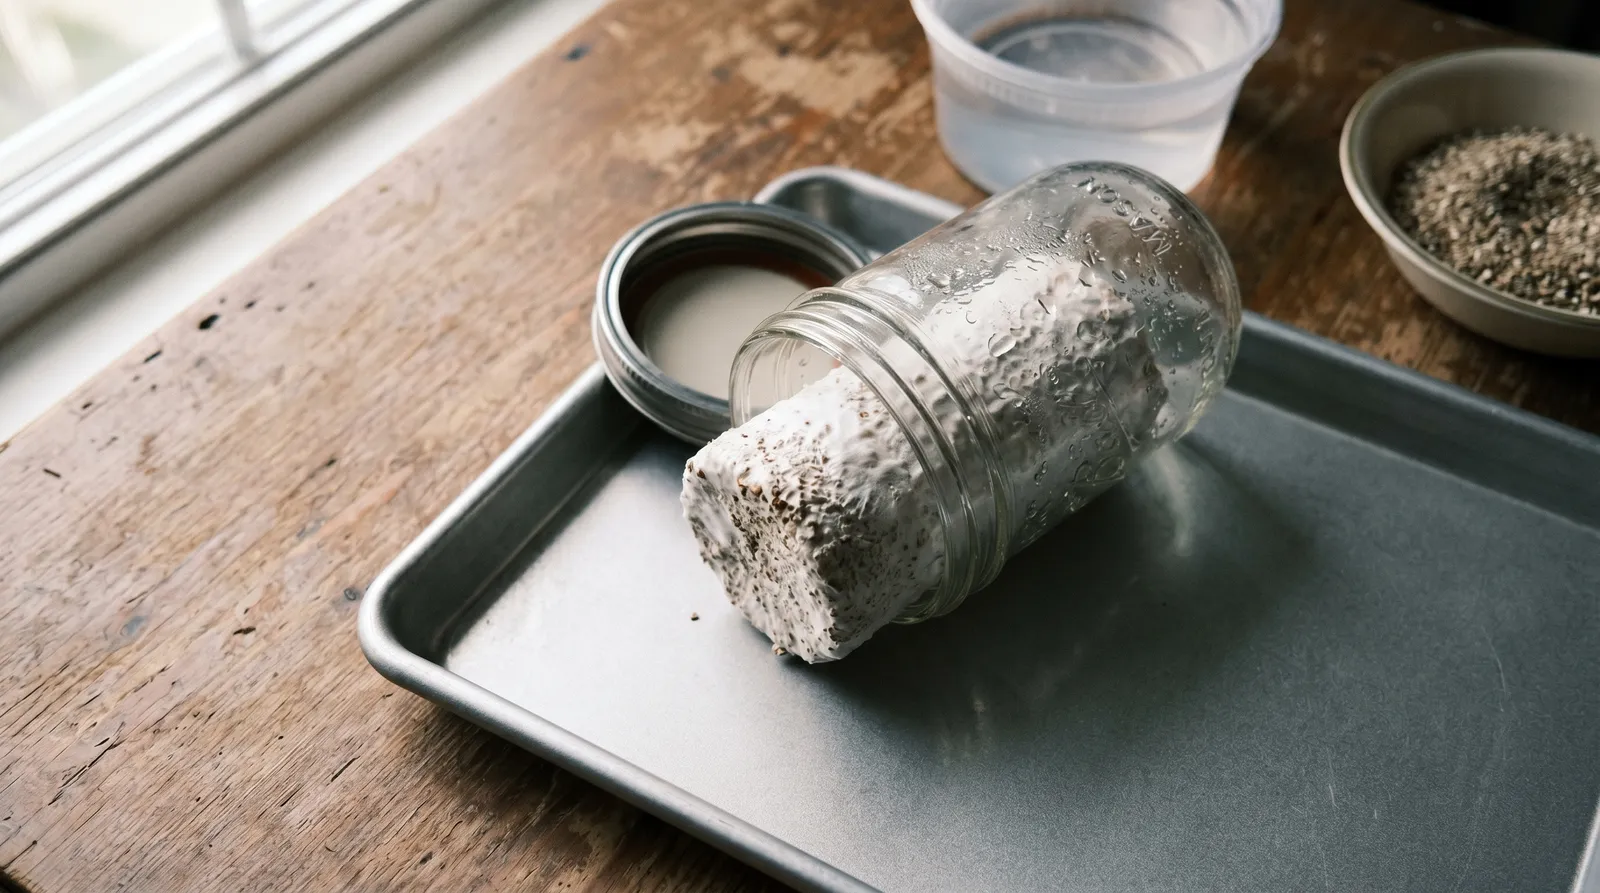
Step 6 — Birth, dunk, and roll
Birthing a cake means unscrewing the lid and tapping the jar upside-down onto a sanitised surface — the substrate should slide out as a single solid block. Submerge the cakes in cold (4–10°C) drinking water, weighted down, for 12–24 hours. This rehydrates the substrate for later flushes and the cold shock mimics the autumn trigger cubensis evolved to respond to.
Drain the cakes, roll them in dry vermiculite to cover the wet surface (another contamination barrier), and stand them on jar-lid pedestals inside the pre-built SGFC on its bed of wet perlite.
Step 7 — Fruit, flush, repeat
Fruiting conditions are 22–24°C, 90%+ relative humidity, indirect ambient light on a 12/12 cycle (any room lamp works — cubensis uses light as a directional cue, not an energy source), and fresh air exchange 4–6 times per day. Misting protocol: lift the chamber lid, mist the inside walls (not the cakes directly) with distilled water, then fan the lid to flush stale air for 30 seconds. Twice daily.
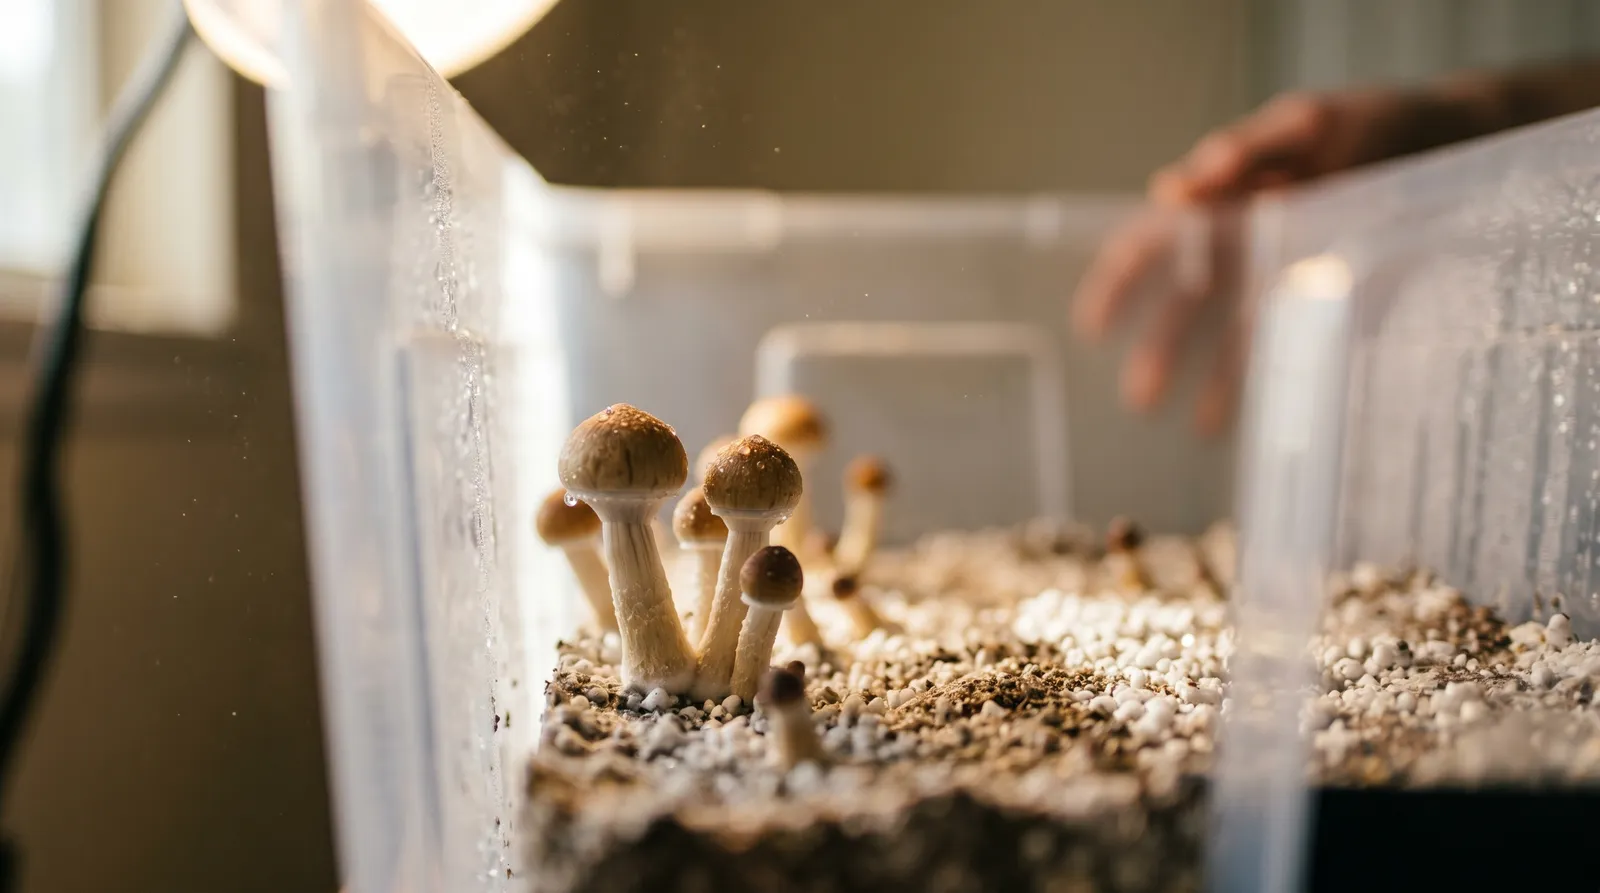
Pinheads appear 5–10 days after casing. Harvest at veil-break — the moment the partial veil beneath the cap tears but before spores drop. A first flush from a healthy half-pint cake yields 15–25g wet, roughly 1.5–2.5g dry. After harvest, dunk and roll the cake again for flush two. Most cakes give 2–3 usable flushes before yields drop below worth-the-effort.
How PF Tek compares to modern alternatives
PF Tek is slower and lower-yielding than grain-spawn-to-bulk techniques — a point noted in Stamets (2000) and echoed across community consensus on Mycotopia. A 2kg bulk tub can out-yield a six-jar PF run fourfold. What this approach keeps is the learning value: every step is visible, every failure is diagnosable, and the kit list costs under €40. For home growers who already want the finished article without the teaching wheels, pre-colonised formats like the plastic-tub Grow Kit and the sealed Ready-2-Grow Bag skip the jar stage entirely and start at Step 6. The EMCDDA monitors wider European trends in psilocybin-containing mushroom use, which is worth noting alongside the Beckley Foundation's clinical-research outputs for anyone treating cultivation as part of a broader interest in the compound.
Consumption, dosing, and preparation questions sit outside this guide — see the psilocybin hub for that side. A brief safety note that belongs in every cultivation article: dried psilocybin mushrooms interact dangerously with MAOIs, SSRIs, and lithium. Full detail lives in the dedicated psilocybin interactions article.
Related products at Azarius
If the full do-it-yourself cultivation workflow looks like more kitchen-table chemistry than you signed up for, Azarius stocks two pre-made formats that skip straight to fruiting. You can buy the Grow Kit (plastic-tub, casing-layer format — Golden Teacher, B+, McKennaii, Mazatapec, Cambodia, Mexican, PES Amazonian, Treasure Coast) or order a Ready-2-Grow Bag (sealed all-in-one — APE, Enigma, Golden Teacher, Hillbilly Pumpkin, Jack Rabbit, Jedi Mind Fuck, Makilla Gorilla, McKennaii, MVP). Spore syringes for inoculating your own brown rice flour jars are stocked separately — get the strain you want from the spore category.
Disclaimer: This article is educational reference material only. It is not medical, cultivation, or professional advice. Azarius makes no health or outcome claims. If you have questions about your health, medication interactions, or personal circumstances, consult a qualified healthcare professional.
Last updated: April 2026
Frequently Asked Questions
8 questionsHow hard is PF Tek for a first-time grower?
How long does PF Tek take from spore to harvest?
What's the difference between PF Tek and grain spawn?
Why is the dry vermiculite top layer important?
Can PF Tek cakes produce multiple flushes?
What temperature does PF Tek need during colonisation vs fruiting?
What is the correct substrate ratio for PF Tek?
Do I need a pressure cooker for PF Tek sterilisation?
About this article


Adam Parsons is an external cannabis and psychedelics writer and editor who contributes to Azarius's wiki as both author and reviewer. On the writing side, he authors Azarius's kratom and kanna clusters, drawing on exten
This wiki article was drafted with AI assistance and reviewed by Adam Parsons, External contributor. Editorial oversight by Joshua Askew.
Medical disclaimer. This content is for informational purposes only and does not constitute medical advice. Consult a qualified healthcare provider before use of any substance.
Last reviewed April 25, 2026
References (2)
- [1]Stamets, P. (2000). Growing Gourmet and Medicinal Mushrooms (3rd ed.). Ten Speed Press, Berkeley, CA. Source
- [2]Oei, P. (2003). Mushroom cultivation: appropriate technology for mushroom growers (3rd ed.). Backhuys Publishers, Leiden, Netherlands.