This article discusses psychoactive substances intended for adults (18+). If you have a health condition or take medication, consult a doctor before use. Our age policy
Golden Teacher Grow Guide — Step by Step
Definition
A Golden Teacher grow guide is a step-by-step cultivation protocol for Psilocybe cubensis 'Golden Teacher', the most widely grown cubensis strain in Europe. It covers cold-shocking, humidity, fresh air exchange, harvest timing and drying — the full cycle from colonised kit to stored jar (Stamets, 1996).
This guide is written for adults. Psilocybin cultivation rules vary dramatically by country and region and change frequently. This guide is educational. Before growing, verify current rules for your specific jurisdiction.
Why Golden Teacher is the beginner's default
A Golden Teacher grow guide is a step-by-step cultivation protocol that walks a beginner through fruiting Psilocybe cubensis "Golden Teacher" — a wide-capped, golden-brown strain first described in the mycology community in the late 1980s and now the most cultivated cubensis variety in Europe. It earns the beginner slot because the mycelium is aggressive, forgiving of small humidity swings, and colonises rye grain faster than most landrace strains (Stamets, 1996).
This Golden Teacher grow guide covers the cultivation side only — from unboxing a colonised kit to drying the last flush. Consumption, dosing, set & setting, and interactions with MAOIs, SSRIs, or lithium sit on the psilocybin hub and the dedicated interactions article. Don't mix the two workflows.
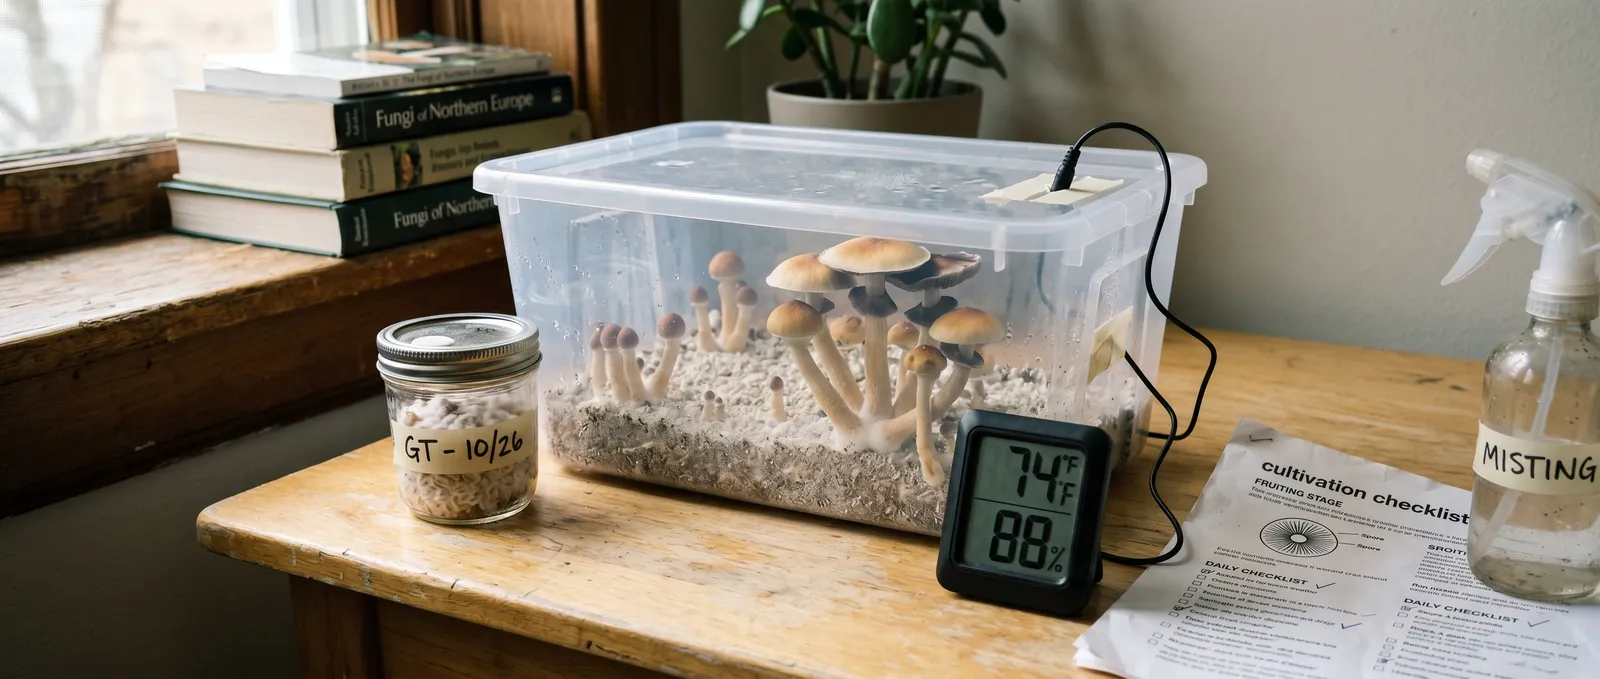
What you need before you start
Before you open any kit, get your station ready. Home cultivation fails on hygiene more than on technique. A 2010 review of amateur mushroom contamination (Chilton, cited in the Shroomery contamination archive, 2010 thread) found that over 70% of failed grows trace back to airborne moulds introduced during the first 48 hours after unboxing.
- A room at 21–24 °C. Cubensis mycelium stalls below 18 °C and starts aborting pins above 27 °C.
- Indirect daylight or a 6500 K LED on a timer — 12 hours on, 12 off. No direct sun.
- A spray bottle with fresh, room-temperature tap water (in most of the Netherlands and Germany, tap is fine; in hard-water regions consider bottled still water).
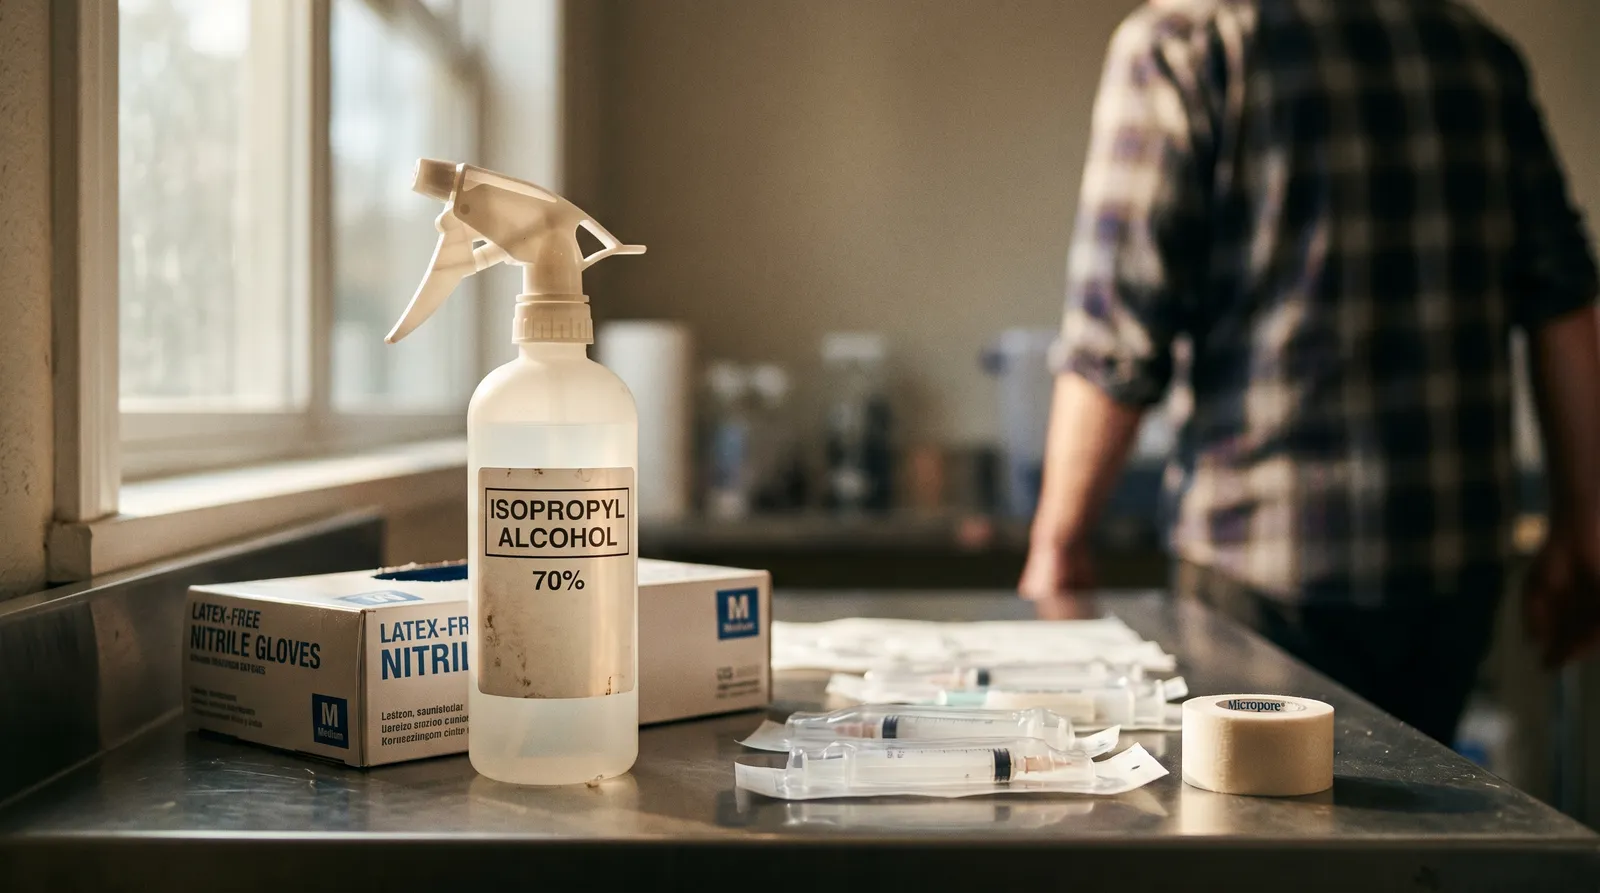
- Disposable nitrile gloves, 70% isopropyl alcohol, and kitchen roll.
- A clean surface away from food prep. Kitchens are flour-dust minefields — Aspergillus loves a baker's countertop.
- A digital hygrometer-thermometer. Guessing humidity by eye is how people end up with leather-dry cakes or soupy cobweb mould.
The 8 steps from cold box to dried jar
The full cycle — cold shock, fruiting, harvest, drying, and re-dunking — takes roughly 3–5 weeks per flush cycle from a colonised kit. Each step below maps to one stage of that timeline.
| Step | Stage | Typical timing | Target condition |
|---|---|---|---|
| 1 | Cold shock | Day 0, 12 hours | 10–15 °C water bath |
| 2 | Drain & bag | Day 1 | 2–3 cm FAE gap |
| 3 | Park the kit | Day 1+ | 23 °C, stable shelf |
| 4 | Mist & fan | Twice daily | CO₂ below ~1000 ppm |
| 5 | Pin formation | Day 5–10 | White bumps, then brown tips |
| 6 | Harvest | Day 10–14 | Veil break, pre-sporulation |
| 7 | Dry | 36–60 hours total | Cracker-dry, ~5% moisture |
| 8 | Re-dunk | After each flush | Repeat until kit exhausts |
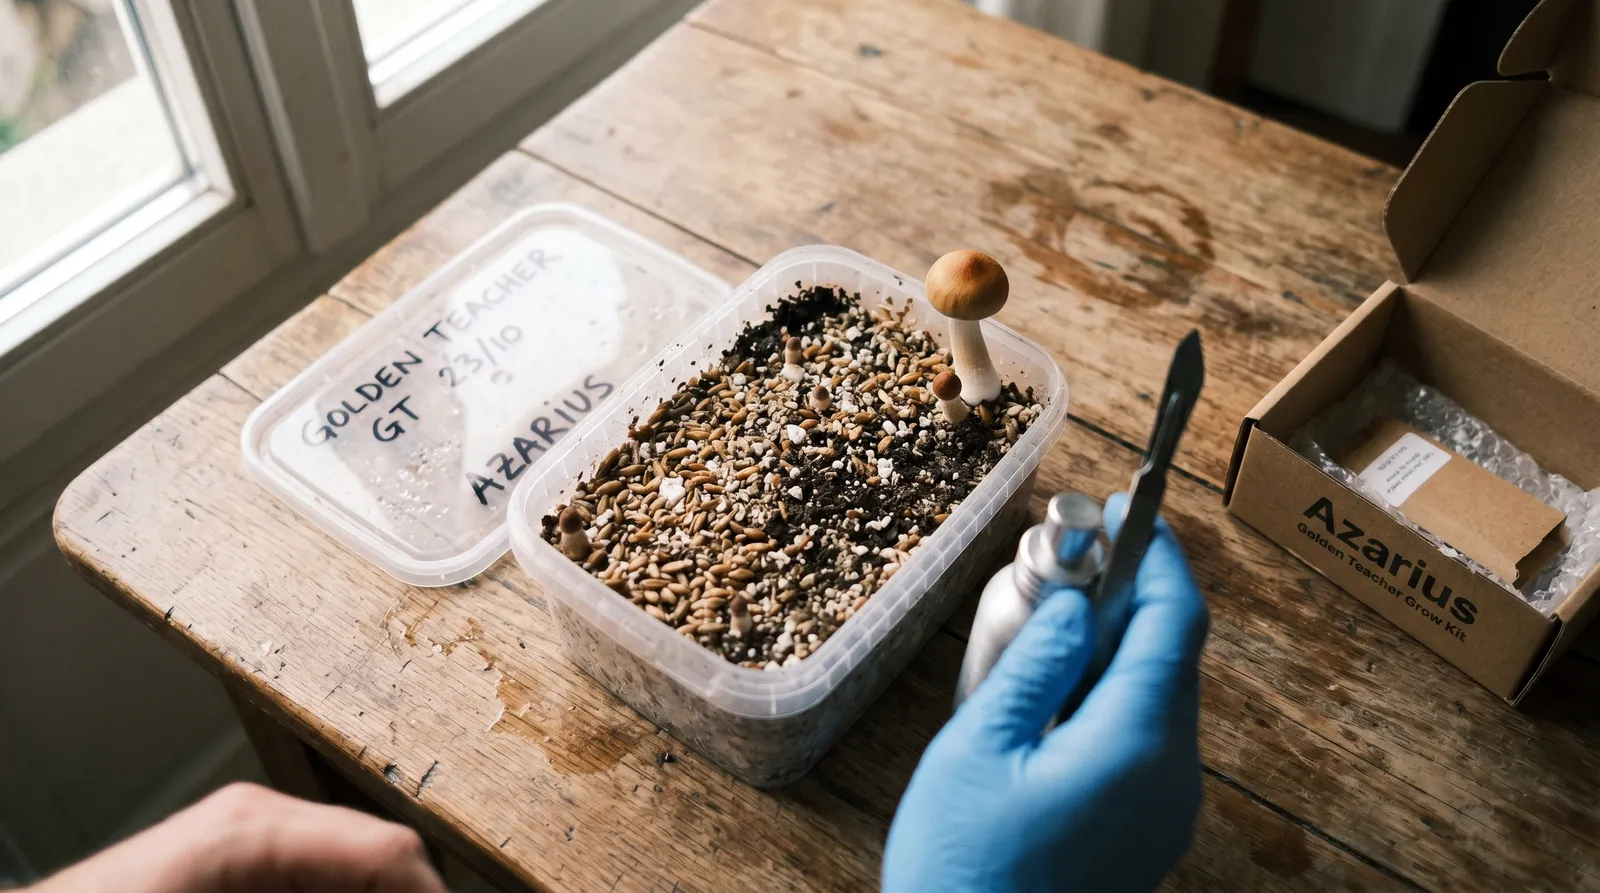
Step 1 — Cold-shock the colonised cake
Remove the plastic lid and the filter bag from the tub. Fill the tub to the rim with cold tap water (10–15 °C), replace the lid, and put the whole thing in the fridge for 12 hours. This simulates the autumn rain that triggers fruiting in wild cubensis populations and synchronises the first flush (Guzmán, 1983, The Genus Psilocybe).
Step 2 — Drain and set up the humidity tent
After 12 hours, pour out the water, drain the cake mouth-down for 60 seconds, and place the tub back inside the filter bag. Do NOT seal the bag airtight — fold the top over and clip it with the supplied paperclips, leaving a 2–3 cm gap for fresh air exchange (FAE). Spritz the inside walls of the bag (not the cake itself) twice.
Step 3 — Park it somewhere stable
Put the bagged kit on a shelf at 23 °C, out of direct sunlight. A bedroom wardrobe with the door cracked open is fine. Avoid kitchens, bathrooms, and anywhere with wild temperature swings — a radiator-adjacent shelf that hits 28 °C by 3 pm will abort your first pins.
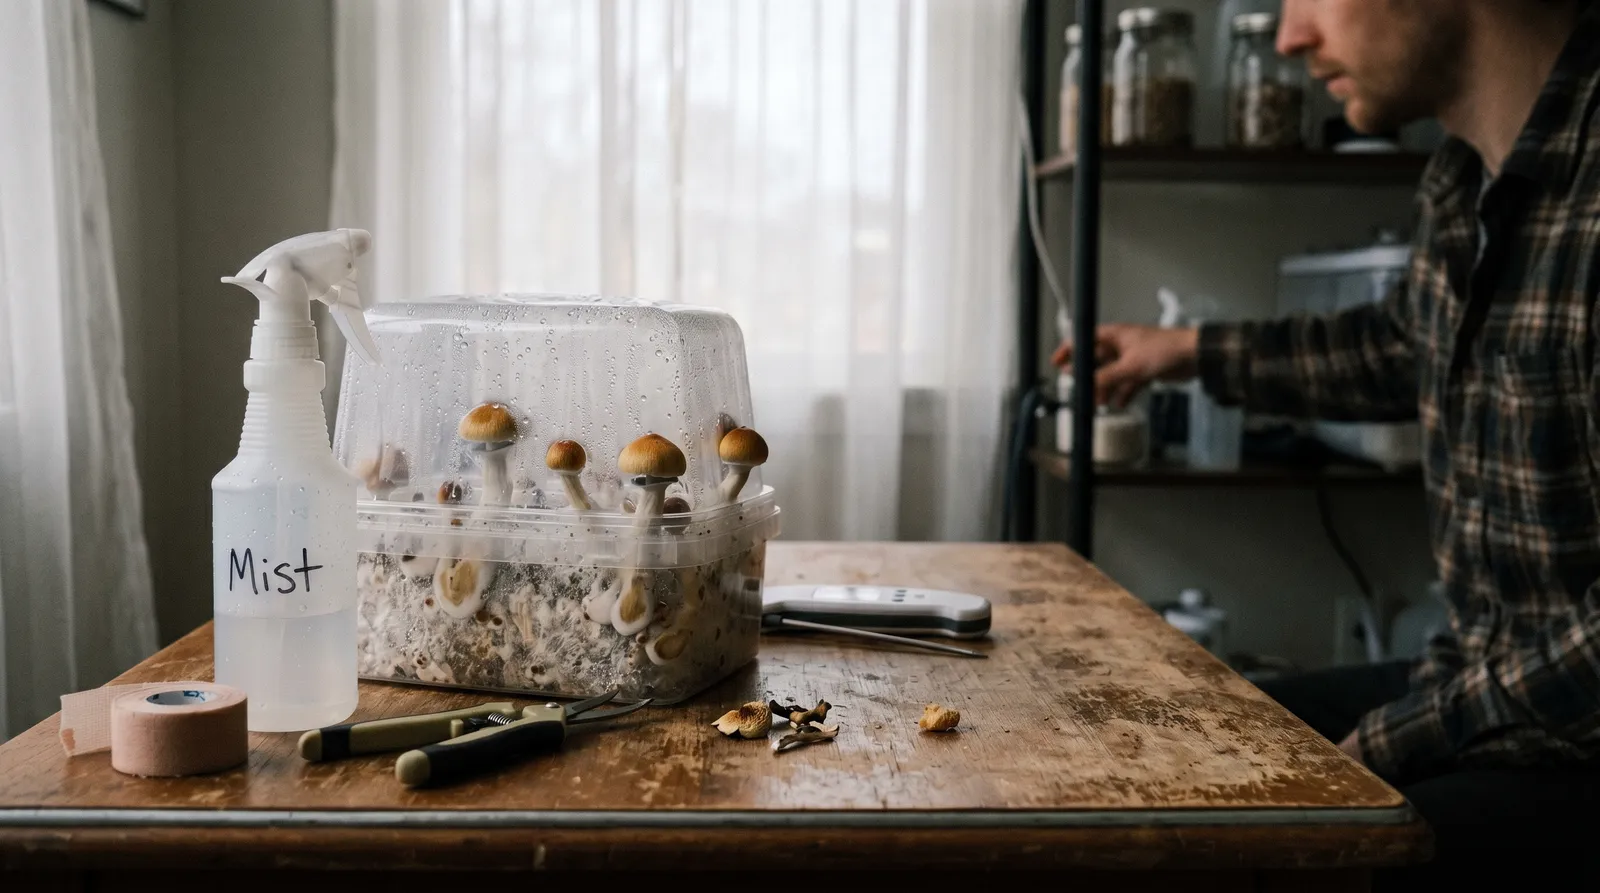
Step 4 — Mist and fan twice a day
Morning and evening: open the bag, spritz the inner walls lightly (never the casing layer directly — standing water invites bacterial blotch), and fan the bag with the filter flap a few times to swap out stale CO₂. Cubensis needs CO₂ levels below ~1000 ppm to form normal caps; trapped air produces long, spindly, small-capped "leggy" fruits.
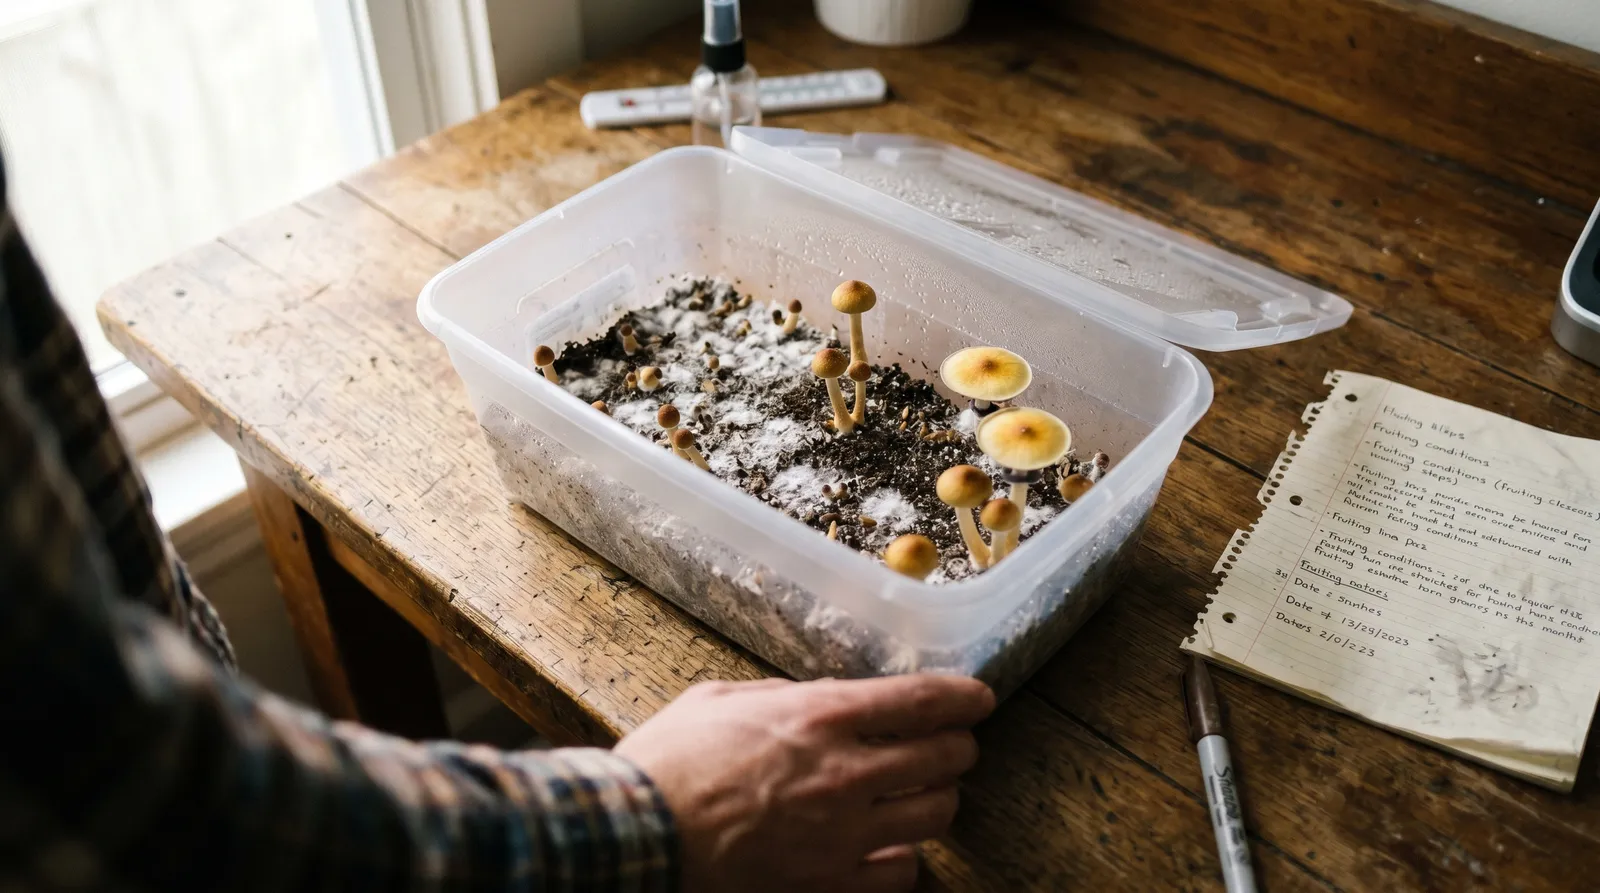
Step 5 — Watch for pins (day 5–10)
Tiny white bumps, then brown-tipped primordia, appear across the casing layer. Once you see pins, reduce misting slightly — the pins themselves carry water, and over-misting at this stage drowns them. Continue the twice-daily FAE.
Step 6 — Harvest at veil break
Pick when the partial veil (the thin tissue connecting cap edge to stem) tears, but BEFORE the cap flattens and drops dark spores. This is the peak alkaloid window. Bigwood & Beug (1982, Journal of Ethnopharmacology) measured total psilocybin + psilocin content across the fruiting cycle of P. cubensis and found peak concentrations around veil rupture, dropping measurably as caps opened and sporulated.
Grab the base of the stem between thumb and forefinger, twist gently, and pull. Don't cut — stem stubs left in the casing rot and invite bacteria.
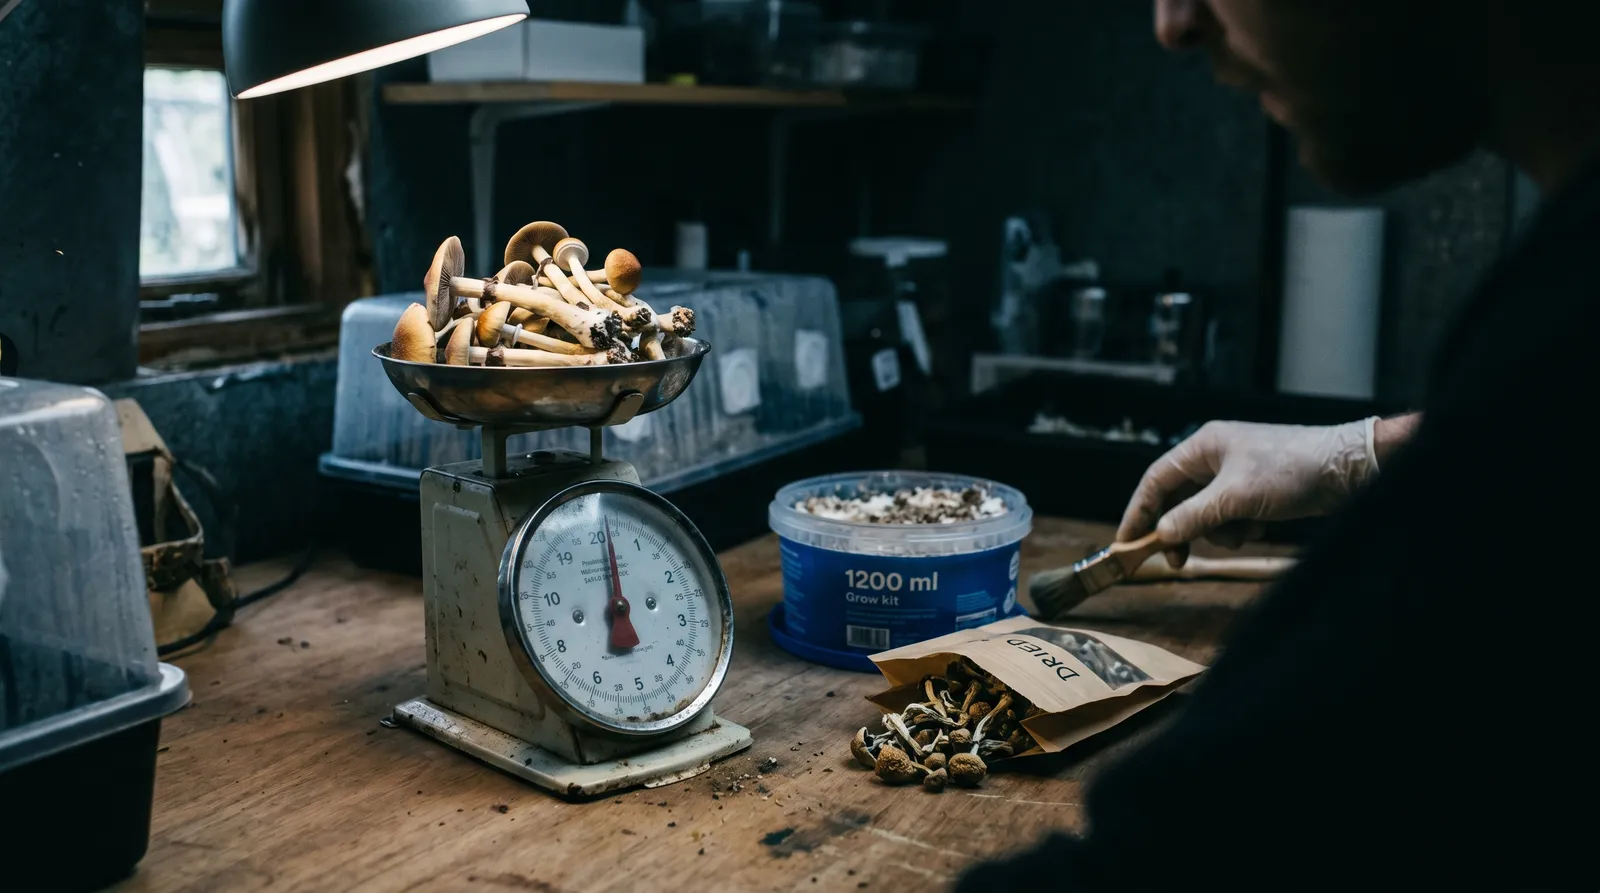
Step 7 — Dry properly
Fresh mushrooms are ~92% water. "Cracker dry" is the benchmark — a stem should snap, not bend. Two-stage drying works best:
- Pre-dry 12 hours on kitchen roll in front of a fan at room temperature. Never on a radiator — heat above 40 °C degrades psilocin significantly (Gartz, 1989).
- Finish on desiccant — silica gel beads or anhydrous calcium chloride in a sealed container, mushrooms on a grate above the desiccant (not touching). 24–48 hours until cracker-dry.
Wear an FFP2 mask during drying and handling. Mushroom spores are a documented respiratory allergen ("lycoperdonosis" and general basidiospore hypersensitivity are well-described in occupational mycology literature). A cupboard full of sporulating caps is a nose-and-lung problem.
Step 8 — Dunk for the next flush
After harvest, scrape off any leftover stem bases, refill the tub with cold water, and cold-shock again for 12 hours. Most Golden Teacher kits deliver 3–4 flushes, with yields dropping roughly 30–50% per flush. When the casing starts greening, browning, or cobwebbing — stop. Don't chase a fifth flush through a mouldy kit.
Contamination — what each colour means
Toss the kit, don't salvage. No exceptions. These organisms produce mycotoxins that survive drying.
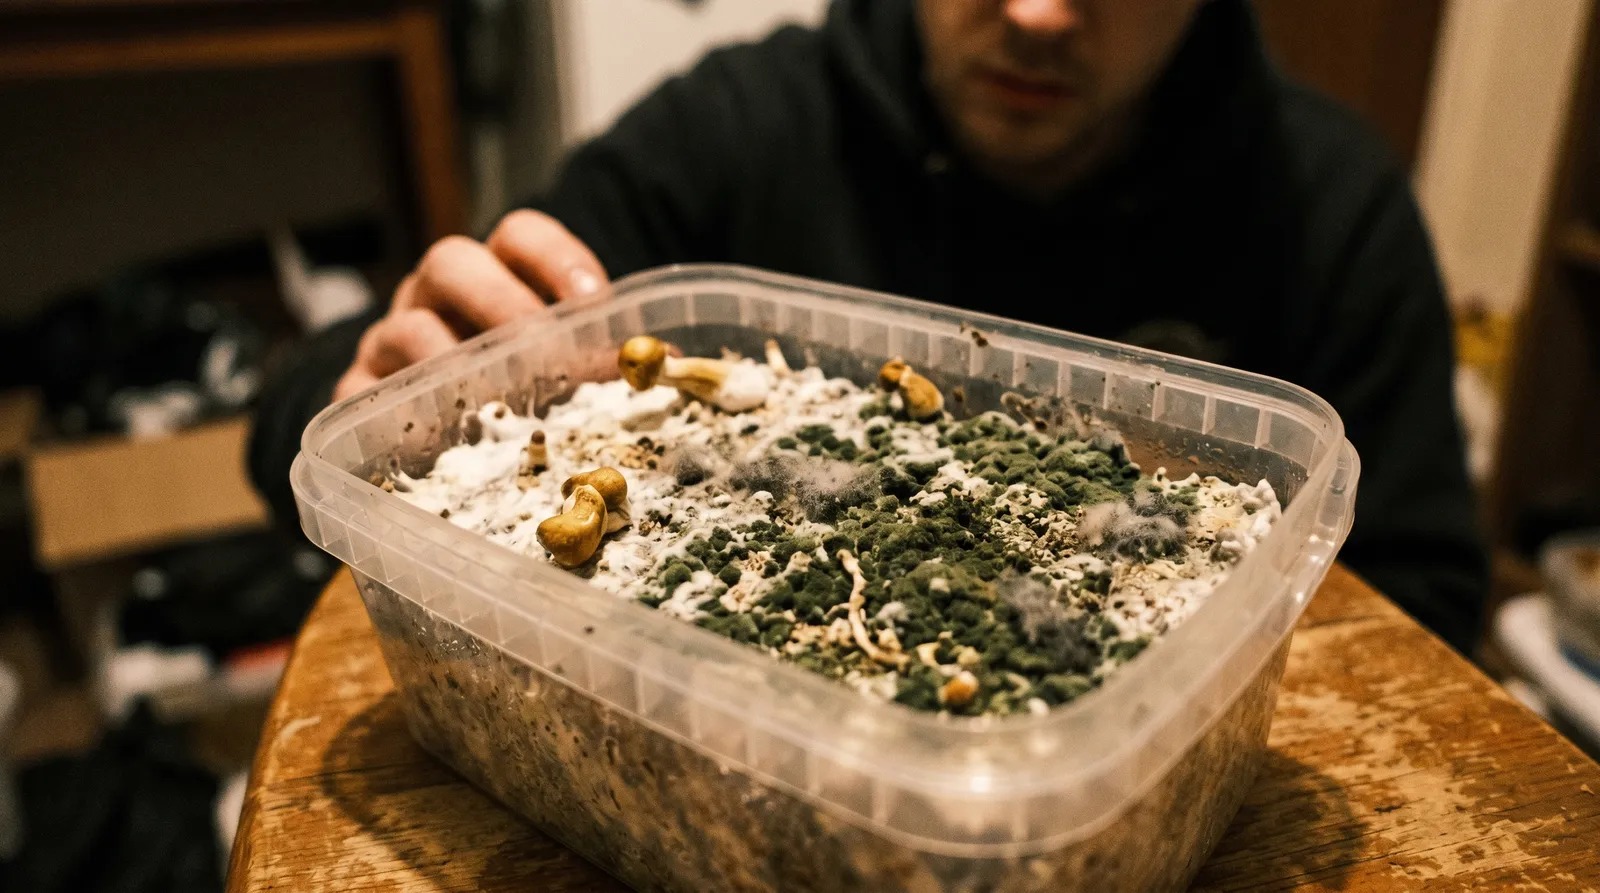
- Bright forest-green patches on the casing — Trichoderma. The single most common cubensis killer. Bin it outside, seal the bag, wipe the shelf with 70% IPA.
- Fine grey spiderweb across the casing, growing faster than mycelium — cobweb mould (Cladobotryum). Sometimes confused with fresh aerial mycelium; the test is speed. Cobweb doubles overnight; aerial mycelium doesn't.
- Dark green-black, powdery — Aspergillus. Respiratory hazard. Do not sniff-test. Bag and bin.
- Pink or orange slime, sour smell — bacterial (often Pseudomonas). Usually from over-misting or tap water left standing.
- Wet, yellow-brown patches with an acrid smell — wet rot. Drop the bag.
Healthy cubensis mycelium is bright white, sometimes with small blue-green bruise spots where it's been knocked (that's psilocin oxidising, not mould — a useful visual confirmation you're actually growing cubensis).
This guide assumes a pre-colonised kit. If you're starting from spores, grain, and a pressure cooker, none of this timing applies — colonisation alone adds 3–5 weeks and a whole second skill set (sterile technique, still-air box, contamination triage on grain). The kit workflow exists specifically to skip that learning curve; treating kit timelines as if they apply to PF-tek grows is a common beginner mistake.
Yield expectations and why numbers vary
A 1200 ml Golden Teacher kit typically produces 400–700 g of fresh mushrooms across all flushes, which dries down to roughly 40–70 g — fresh-to-dry ratio sits around 10:1 for cubensis. These ranges come from aggregated kit-vendor documentation and Shroomery cultivator logs; individual results vary significantly with room temperature, FAE discipline, and water quality.
Alkaloid content in Golden Teacher fruit bodies has been reported at roughly 0.6–1.2% total psilocybin + psilocin by dry weight (Tsujikawa et al., 2003, Forensic Science International), which sits mid-range for cubensis — potent strains like Penis Envy run higher, landrace Mexican runs lower. The EMCDDA's drug profile on hallucinogenic mushrooms aggregates similar ranges across European analytical surveys. Consumption guidance lives on the psilocybin hub.
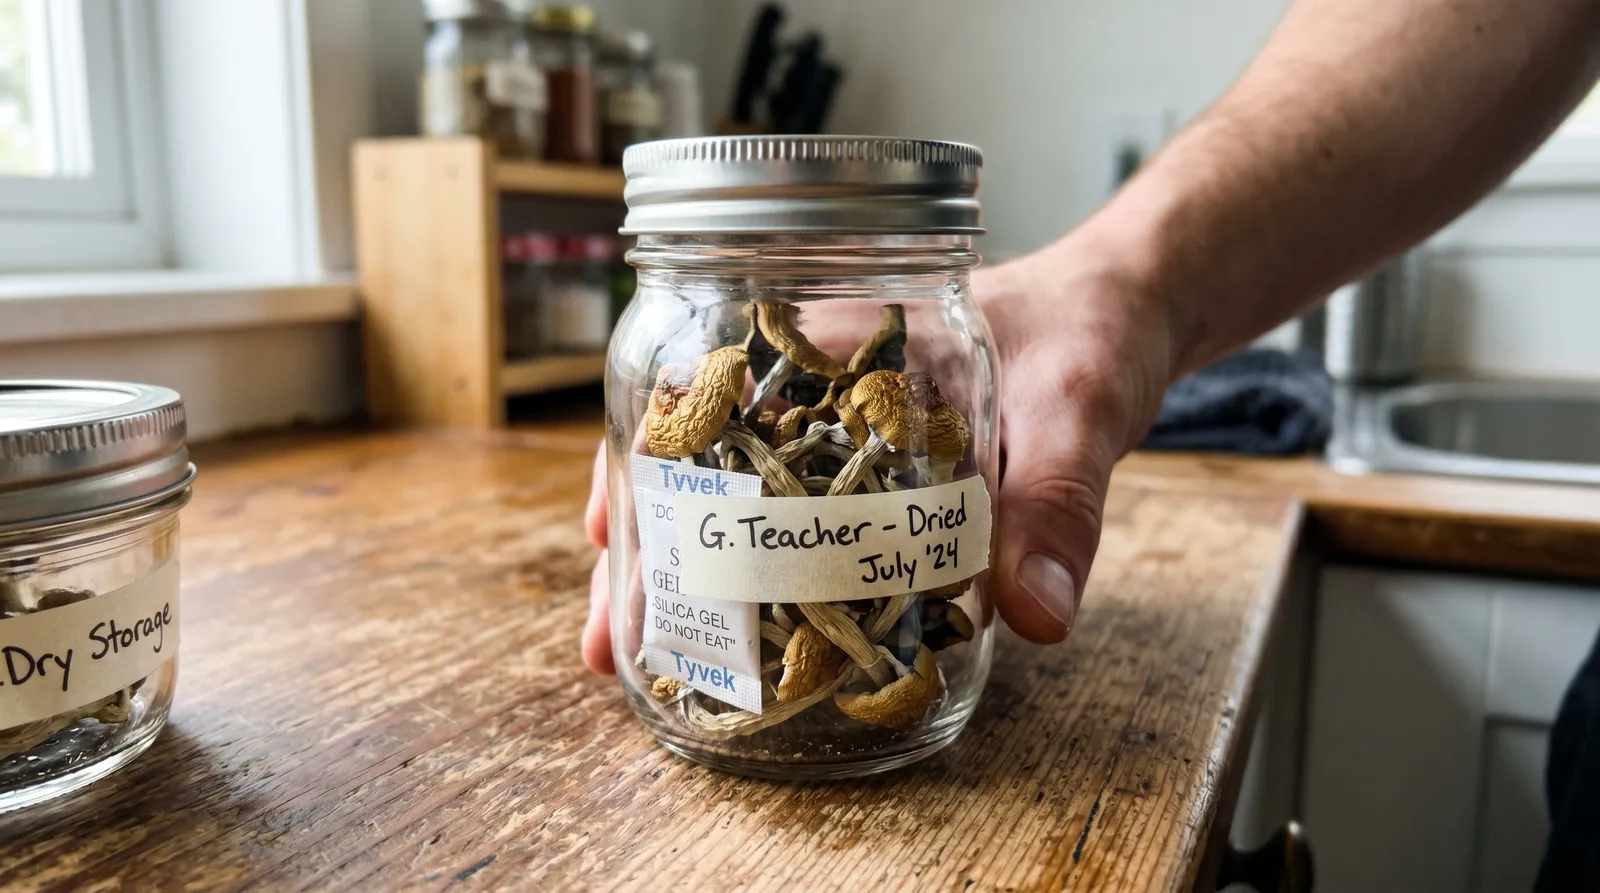
Storage after drying
Cracker-dry mushrooms store best in a sealed glass jar with a fresh silica packet, kept dark and cool. Per the Gartz (1989) analysis, fridge-stored samples retained ~80% of initial psilocybin content after 3 months (freezer is better still) — though that study used cubensis fruit bodies dried to ~5% residual moisture, and results degrade fast if any moisture creeps in. Double-bag, lock the container, and keep it well away from children and pets. Dried cubensis looks like any other dried shiitake or porcini; labelling is mandatory in a shared household.
Azarius Mushroom Grow Kits
Azarius sells Golden Teacher in two formats you can buy and get shipped across Europe: the standard Golden Teacher Grow Kit (the rye-grain plus perlite/vermiculite casing tub the steps above are written for) and the Ready-2-Grow Bag Golden Teacher (a sealed 2 kg all-in-one that skips the assembly and delivers a single larger flush). Order the Grow Kit if you want multiple flushes and don't mind the misting routine. The R2G bag is the one to buy for a low-fuss first grow.
Educational information only. This Golden Teacher grow guide is not medical, therapeutic, or professional advice. Consult a qualified professional for guidance on personal circumstances.
Last updated: April 2026
Frequently Asked Questions
8 questionsHow long does a Golden Teacher kit take to fruit?
What temperature is best for Golden Teacher fruiting?
Why are my Golden Teacher mushrooms long and thin with tiny caps?
How many flushes will a Golden Teacher kit produce?
When exactly should I harvest Golden Teacher?
Can I grow Golden Teacher without any special equipment?
Why does my Golden Teacher kit get contaminated and how do I prevent it?
What is the cold shock for and can I skip it with a Golden Teacher kit?
About this article


Adam Parsons is an external cannabis and psychedelics writer and editor who contributes to Azarius's wiki as both author and reviewer. On the writing side, he authors Azarius's kratom and kanna clusters, drawing on exten
This wiki article was drafted with AI assistance and reviewed by Adam Parsons, External contributor. Editorial oversight by Joshua Askew.
Medical disclaimer. This content is for informational purposes only and does not constitute medical advice. Consult a qualified healthcare provider before use of any substance.
Last reviewed April 25, 2026
References (2)
- [1]Stamets, P. (1996). Psilocybin Mushrooms of the World: An Identification Guide. Ten Speed Press, Berkeley, CA. Source
- [2]Gartz, J. (1989). Biotransformation of tryptamine derivatives in mycelial cultures of Psilocybe. Journal of Basic Microbiology, 29(6), 347-352. DOI: 10.1002/jobm.3620290608