This article discusses psychoactive substances intended for adults (18+). If you have a health condition or take medication, consult a doctor before use. Our age policy
Cannabis Ventilation Carbon Filters Airflow: Tent Setup Guide
Definition
Cannabis ventilation carbon filters airflow refers to the combined system of inline fan, activated-carbon filter and internal circulation that exchanges tent air, scrubs odour and maintains negative pressure. Residence time of roughly 0.1 seconds across the carbon bed is the working target for effective odour adsorption (Growers House, 2024).
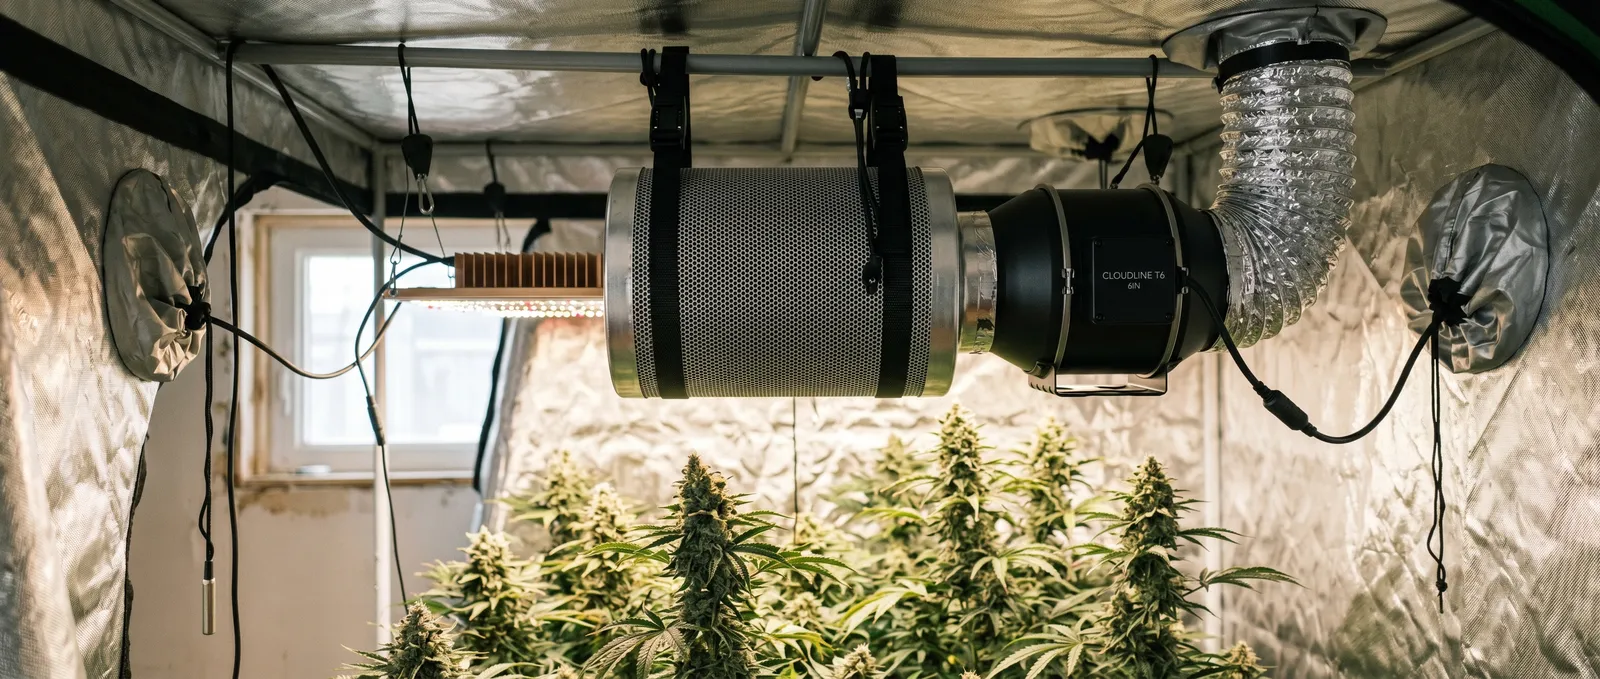
Cannabis ventilation carbon filters airflow is a tent-management system that combines an inline extraction fan, an activated-carbon filter and internal circulation to exchange air, scrub odour molecules and maintain negative pressure inside the grow space. Get the maths wrong and you'll either melt your plants (Zheng et al., 2022), announce your grow to the entire stairwell, or burn out a fan motor by week six of flower. The principle is simple: your extraction fan pulls air through a carbon filter before pushing it out of the tent, scrubbing odour molecules along the way. The execution is where growers stumble. Filter too small, contact time drops and smell leaks. Fan too weak, you lose negative pressure. Fan too strong, the filter can't grip the air long enough to do its job.
Below is the order we'd set things up in our own tent, with the specific numbers that actually matter — CFM, m³/h, residence time, and why a carbon filter has a shelf life whether you use it or not. Most growers buy these parts as a bundle, and it pays to order the fan, filter and ducting together so the flange diameters match.
Step 1: Size the extraction fan to tent volume
The correct fan size is determined by tent volume multiplied by your target air-exchange rate. Start with the volume of the tent in cubic metres. A 1.2 × 1.2 × 2 m tent is 2.88 m³. The working rule from horticultural ventilation guidance (Growers House, 2024) is a full air exchange every 1–3 minutes (Wartenberg et al., 2021), which for that tent means 60–180 m³/h of raw fan capacity. But raw capacity isn't what you get in practice — add a carbon filter, 4–5 metres of ducting and a bend or two, and you'll lose roughly 25–40% of the rated airflow. So get a fan bigger than the maths suggests.

A 150mm (6-inch) inline fan rated around 400 m³/h is the sensible default for tents up to 1.2 × 1.2 m. For a 0.8 × 0.8 m beginner tent, a 125mm fan at ~280 m³/h is plenty. EC fans (electronically commutated) cost more than AC fans but run quieter and let you dial the speed down during lights-off — worth it if the tent lives anywhere near where you sleep.
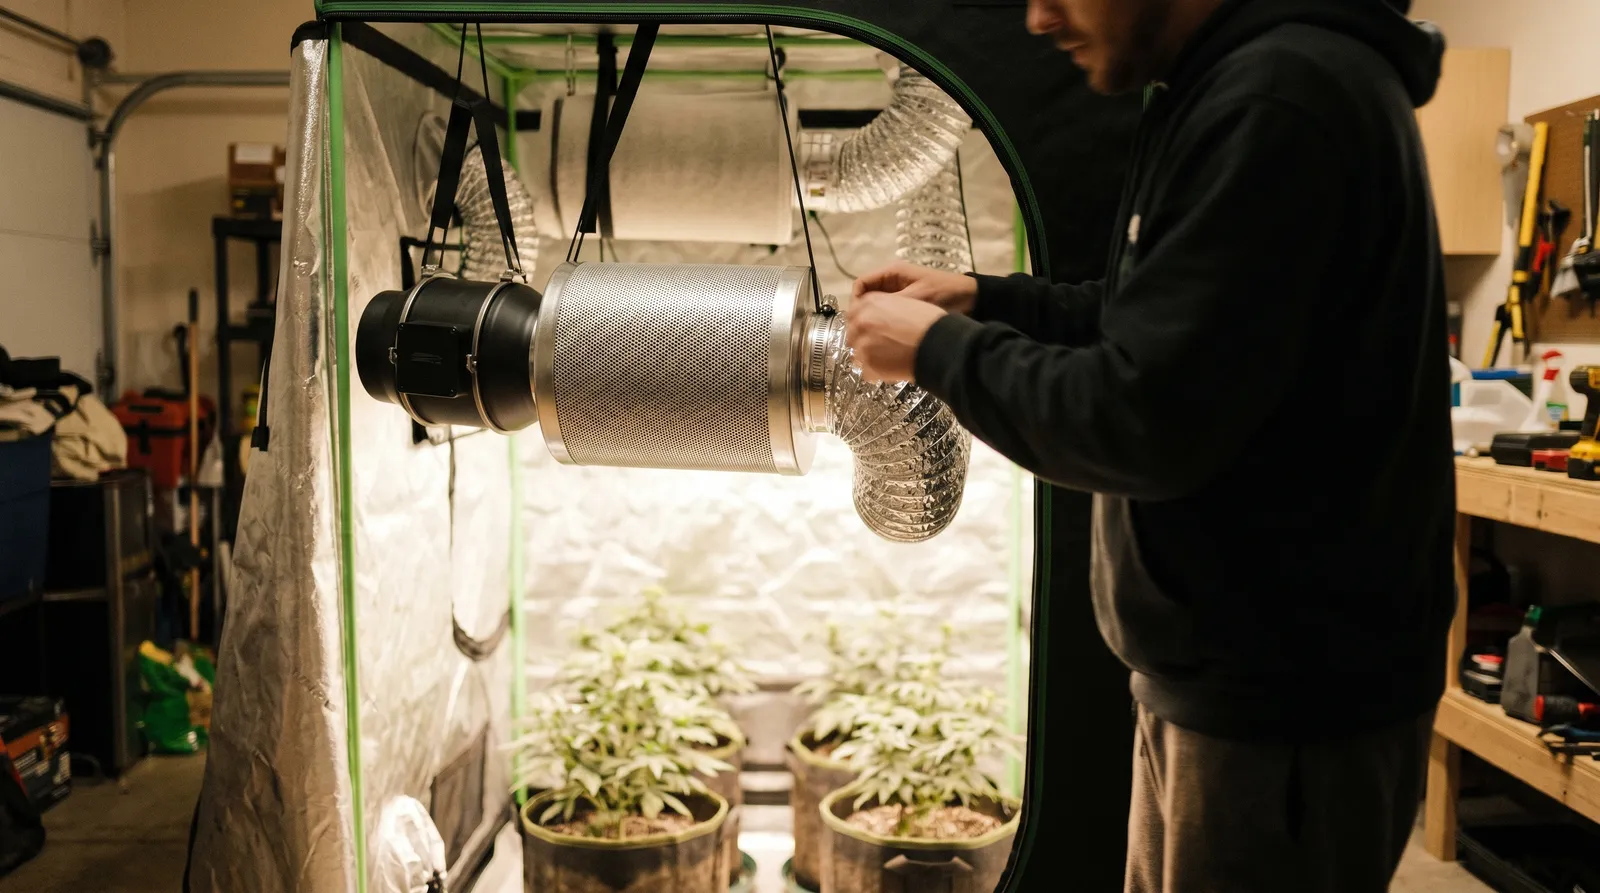
Step 2: Match the carbon filter to the fan, not the other way round
The carbon filter must be rated at or above the fan's airflow to give odour molecules enough contact time with the carbon bed. That contact window is called residence time, and for cannabis terpenes you want roughly 0.1 seconds minimum. Push air through too fast and the molecules sail past unscrubbed.
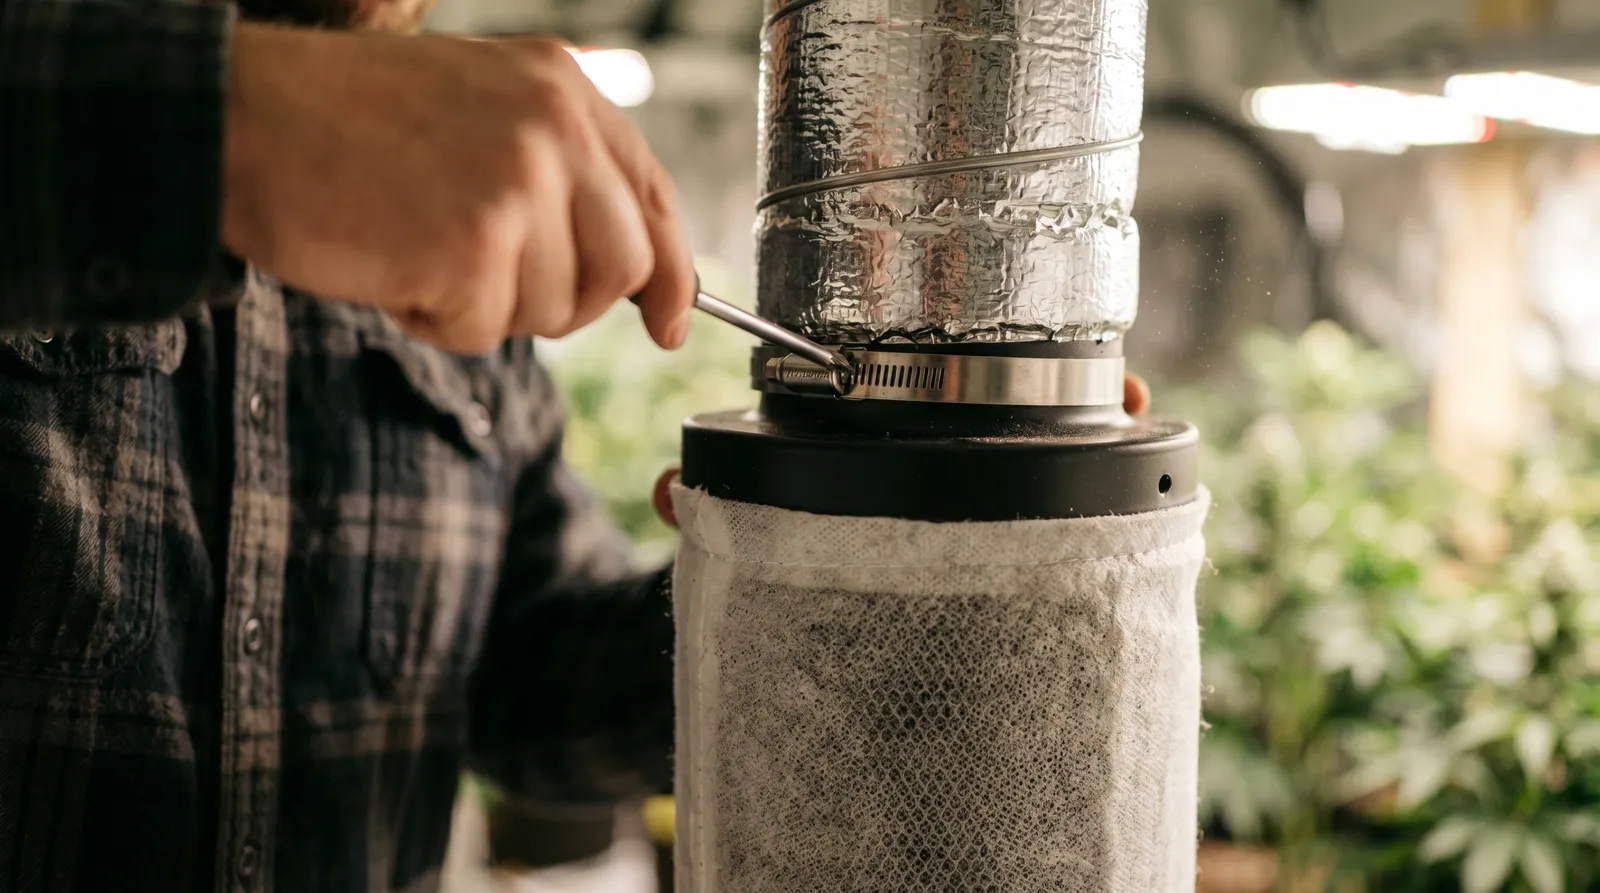
Practical rule: the filter's rated airflow should be equal to or slightly higher than your fan's rated airflow. A 400 m³/h fan wants a filter rated 400–500 m³/h. Filter flange diameter must match the fan — 125mm fan, 125mm filter. Carbon depth matters too: cheap filters use a 38mm bed, quality filters use 50mm or more. The deeper bed gives longer contact time and lasts longer before saturating. Phresh, Can-Filters, and Rhino are the three brands we've seen hold up reliably over multiple grows.
| Tent footprint | Fan size | Fan airflow | Filter rating |
|---|---|---|---|
| 0.8 × 0.8 m | 125mm | ~280 m³/h | 300–400 m³/h |
| 1.0 × 1.0 m | 125–150mm | ~350 m³/h | 400 m³/h |
| 1.2 × 1.2 m | 150mm | ~400 m³/h | 400–500 m³/h |
| 1.5 × 1.5 m | 200mm | ~700 m³/h | 700–900 m³/h |
Step 3: Set up for negative pressure
Negative pressure means the tent walls pull slightly inward when the fan runs, guaranteeing every molecule of tent air exits via the filter. Lose negative pressure and you lose odour control, full stop.
To achieve it: your extraction fan (pulling air out through the filter) must move more air than any intake fan pushing air in. Passive intake — a mesh-covered vent at the bottom of the tent with no fan — is the simplest solution. The extraction fan creates suction, fresh air gets pulled in through the passive vent, and the tent sits under slight vacuum. If you want active intake, undersize the intake fan to around 70–80% of the extraction fan's capacity.
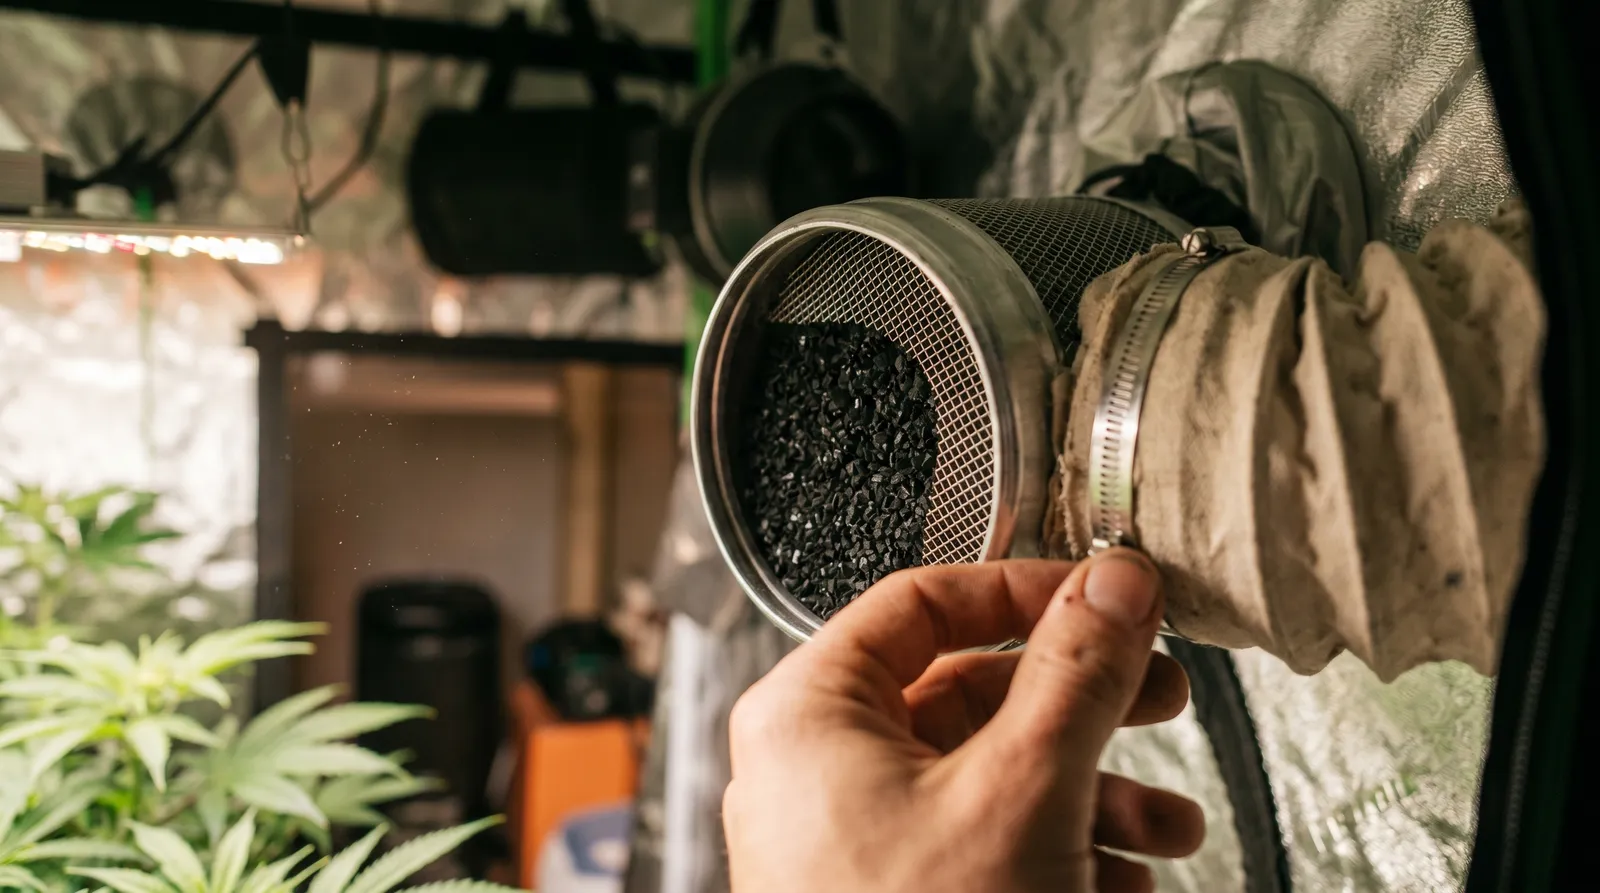
Step 4: Position the filter inside or outside the tent
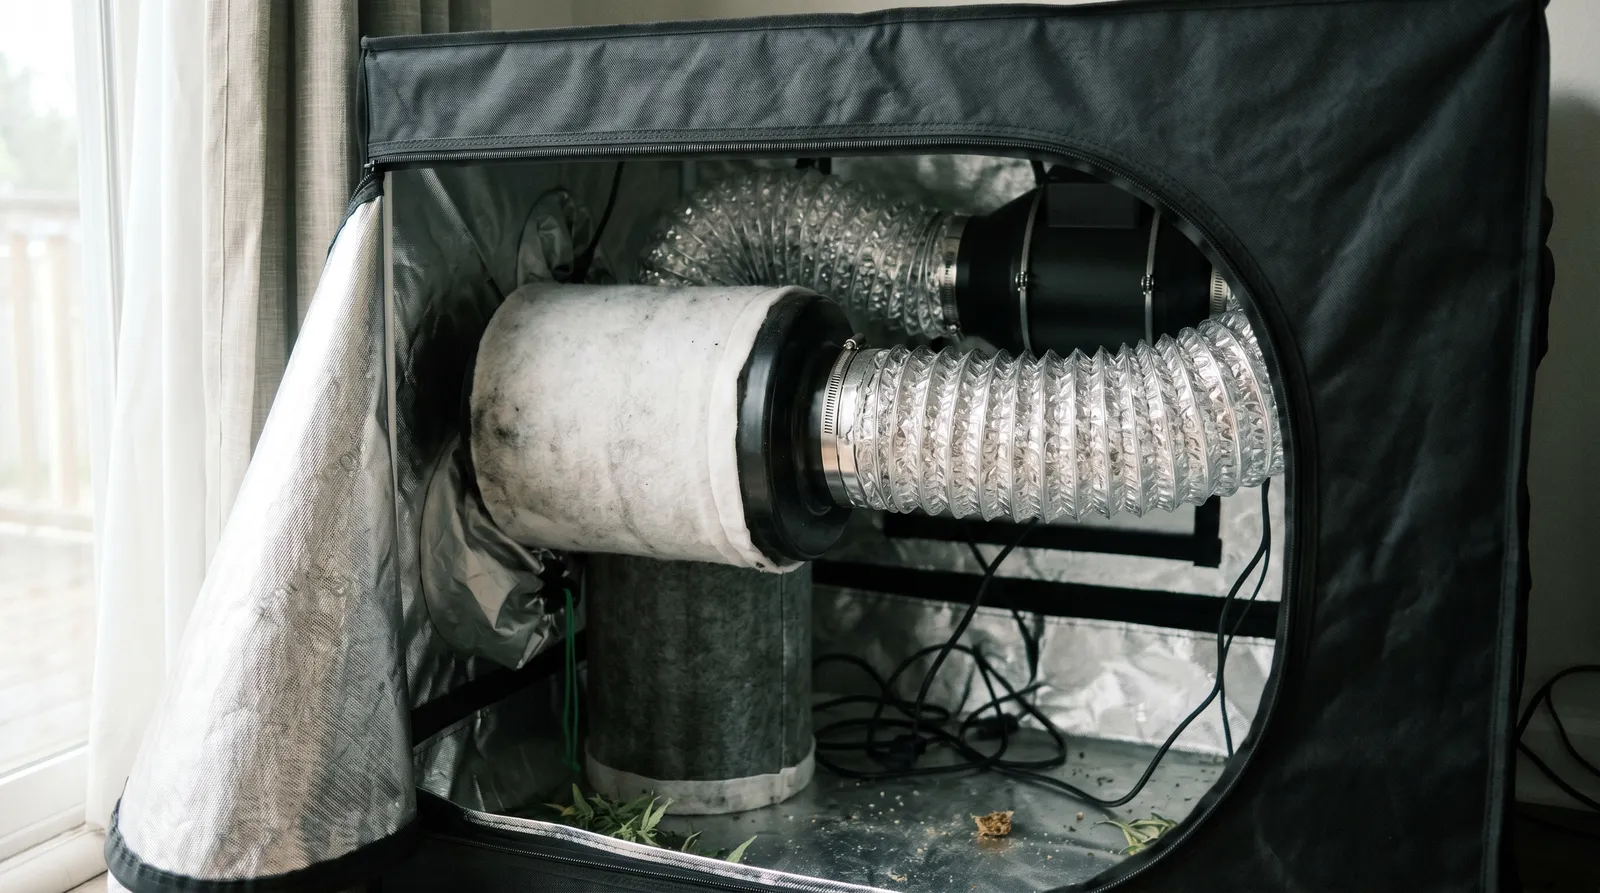
The standard position is inside the tent, hanging from the top bar: filter → short duct → inline fan → ducting out. This scrubs air before it ever meets the fan, keeping the fan housing clean and making the whole run quieter because the filter itself muffles intake noise.
Outside the tent is an option when tent space is tight, but you lose a bit of odour control because any leaks between the tent exhaust port and the filter inlet are unscrubbed. If you go external, keep the run short and seal every joint with aluminium ducting tape. Honest limitation: external mounting is genuinely louder, and we've never seen a tidy external run in a home cupboard — pick internal unless you're fighting for every square centimetre.
Step 5: Add internal circulation fans
Internal circulation fans handle air movement inside the canopy, which extraction alone cannot do. Stagnant pockets under leaves are where powdery mildew and botrytis get comfortable (Punja, 2021), and weak stems come from plants that never feel a breeze (Burgel et al., 2020). A small oscillating clip fan — or two, positioned above and below the canopy — solves both problems.
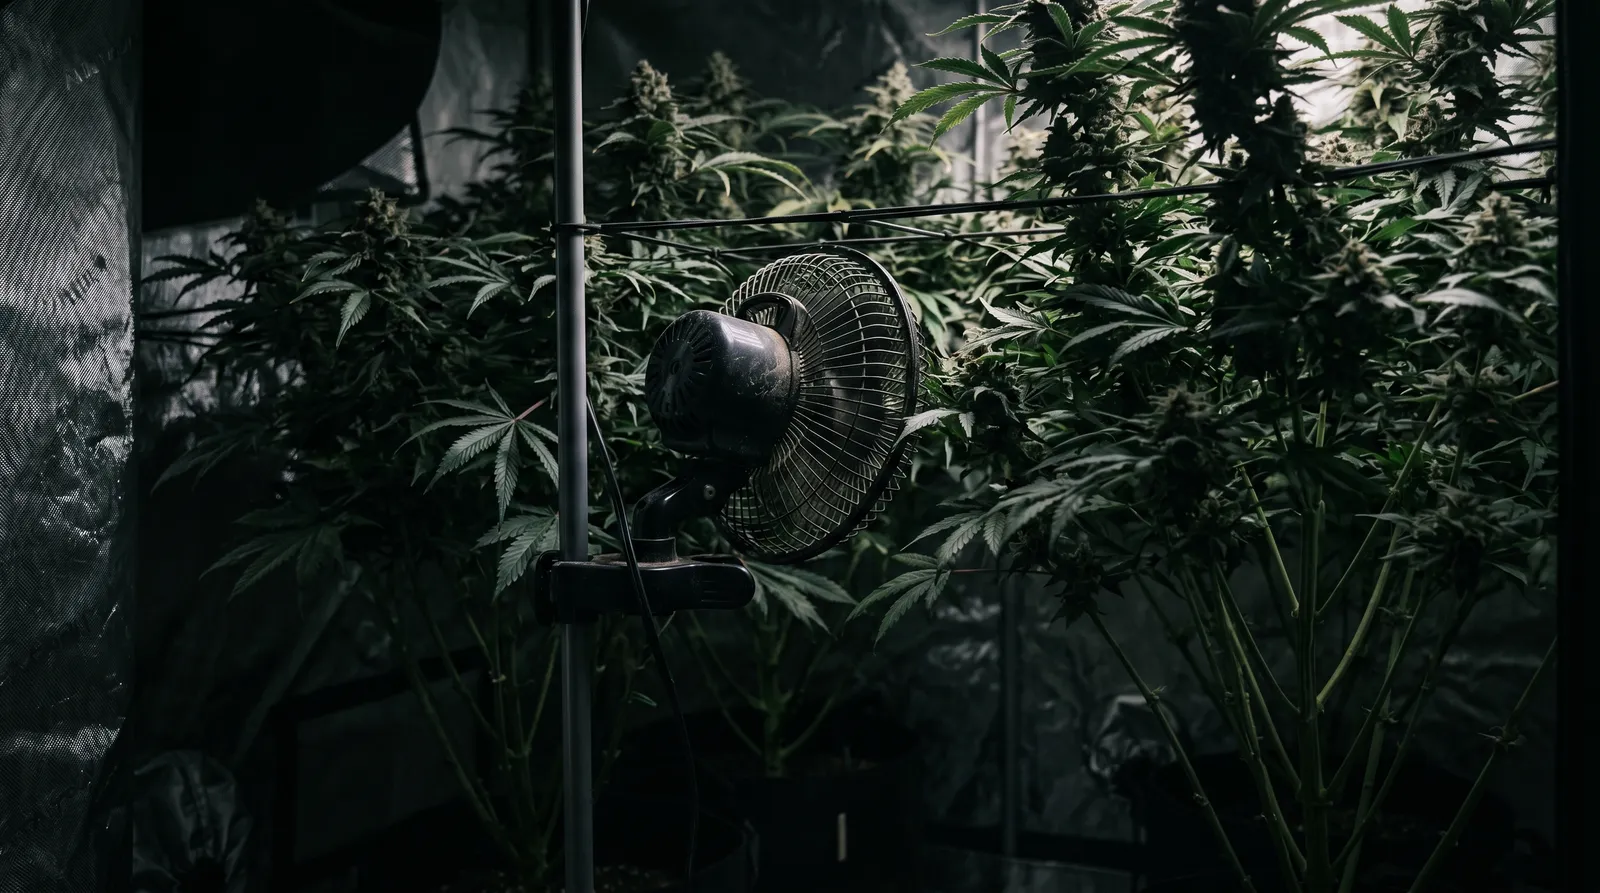
Aim for enough movement that leaves shimmer slightly, not enough to whip them. A 15cm clip fan in a 1.2 × 1.2 tent is the minimum; two is better. Point them across the canopy, never directly at a single plant for hours on end (wind burn is real — you'll see curled, clawed leaves).
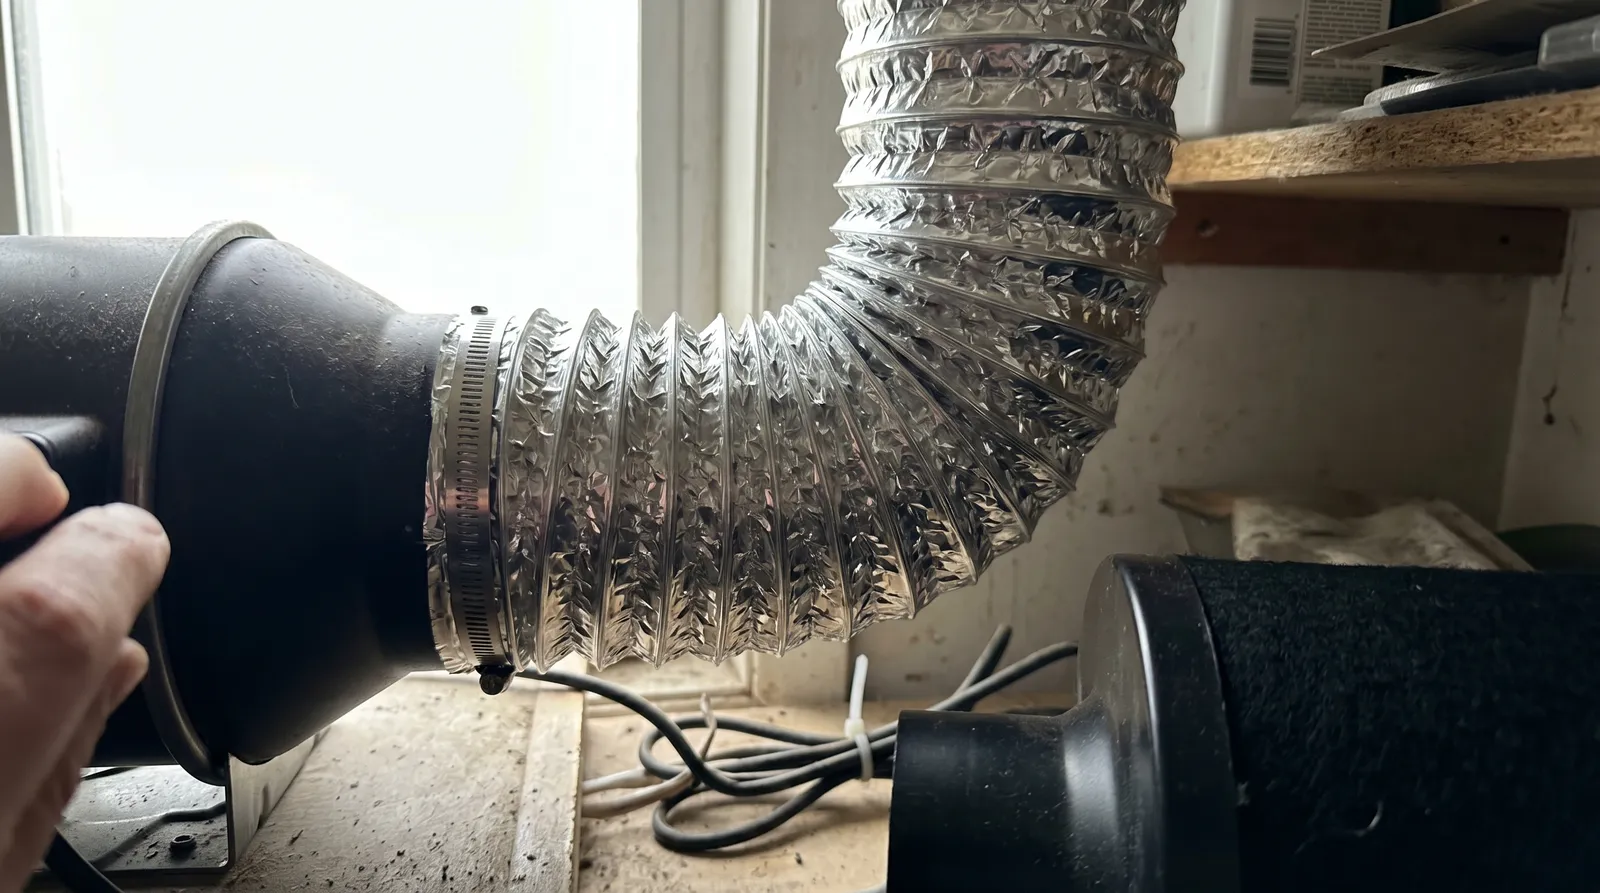
Step 6: Plan the duct run
Every bend in the ducting drops real-world airflow, so keep the run short and straight. Two 90-degree bends in aluminium flexi-duct can shave 15–20% off a fan's rated output. Pull the duct taut rather than leaving it accordion-slack, and use insulated acoustic ducting if noise matters — it's roughly three times the price of plain aluminium but drops fan hum by several decibels.
Exhaust destination matters too. Venting into the same room is fine if that room has its own airflow to somewhere else; venting into a sealed cupboard just recirculates heat and humidity back into your intake. A window vent or attic exit is ideal.
Step 7: Replace the filter on schedule, not when you notice smell
A quality carbon filter should be replaced every 12–18 months of continuous use, not when smell starts leaking. Activated carbon doesn't "wear out" visibly — it saturates, every adsorption site fills with molecules, and then it stops working, often without dramatic warning. High humidity shortens this significantly, because water vapour competes with odour molecules for the same carbon sites (Caplan et al., 2019). Running a dehumidifier in flower extends filter life as well as protecting the crop.
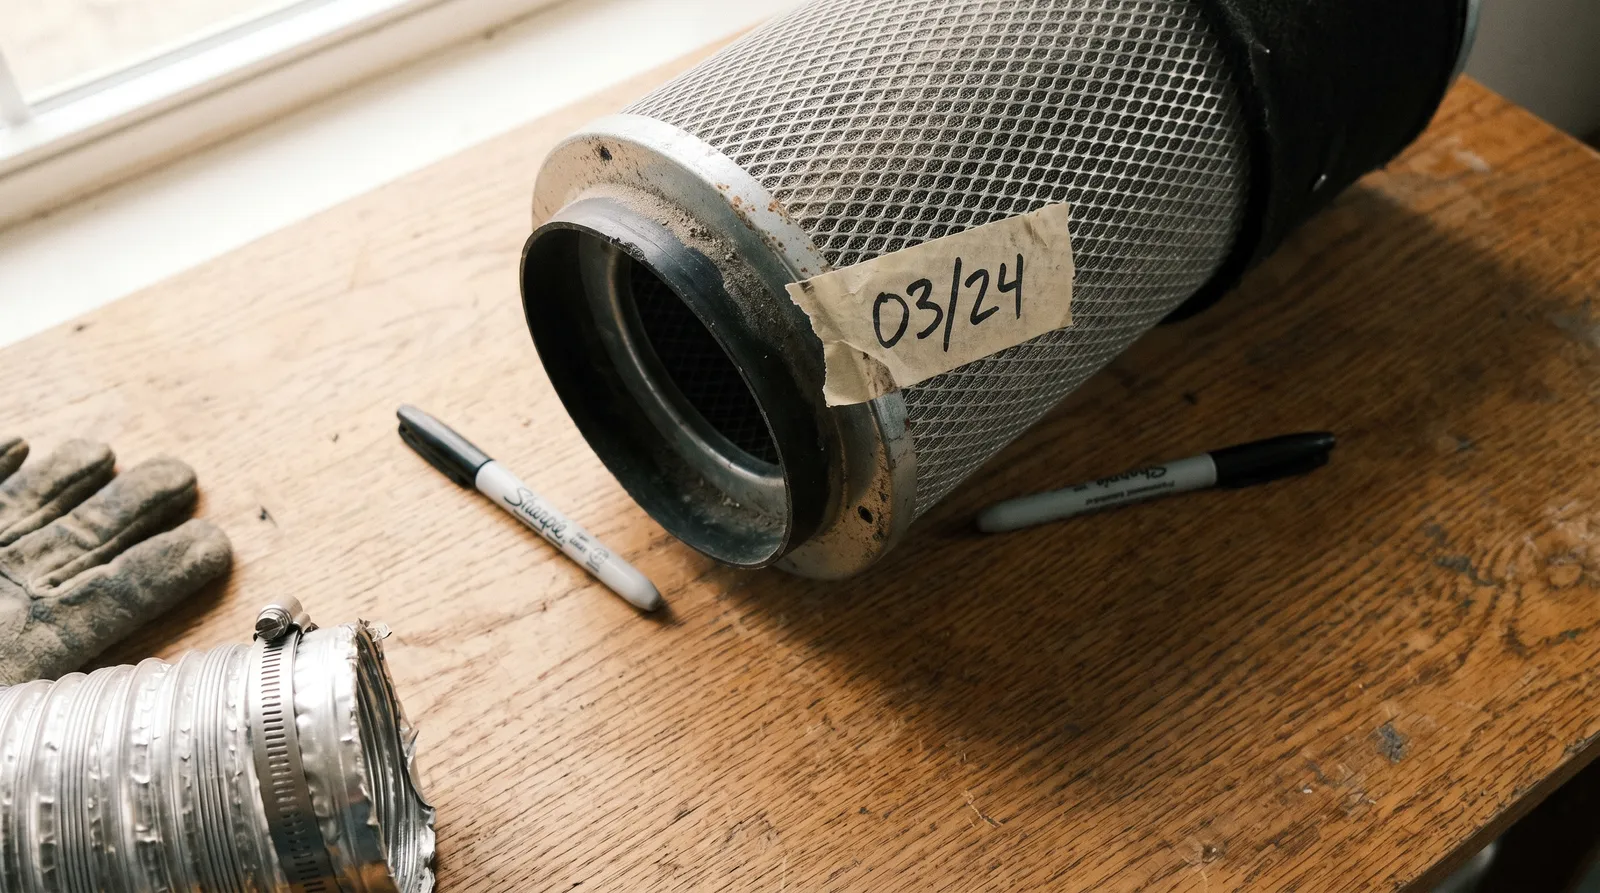
Some growers reverse-mount their pre-filter sleeve halfway through a grow to expose fresh sock surface, which helps dust loading but doesn't regenerate the carbon itself. When a filter starts letting odour through in flower week 5 or 6 — the smelliest stretch of the cycle — it's saturated, not faulty. Replace, don't apologise to the neighbours.
Common mistakes worth avoiding
- Undersizing to save money. A fan that runs at 100% duty cycle to keep up will die inside a year. Buy one size up and run it at 60–70%.
- Ignoring lights-off ventilation. Humidity spikes during dark hours. Your fan needs a lights-off speed setting, not an on/off timer.
- Relying on ozone generators or ONA gel alone. These mask odour in the room outside the tent; they don't solve the source, and ozone at plant-contact levels damages terpenes and trichomes (Craven et al., 2019).
- Forgetting CO₂. Ambient outdoor air sits at 400–420 ppm CO₂. Plants in a well-lit tent can deplete this quickly if extraction is too slow (Fluence, 2023). A full air exchange every 1–3 minutes also handles CO₂ replenishment for non-supplemented grows.
Compared to sealed CO₂-supplemented rooms, a simple passive-intake negative-pressure tent is cheaper, quieter to run and forgiving of mistakes — the trade-off is slightly slower growth rates in veg. For most home growers, the simpler system wins.
Note that humidity and airflow also affect drying and curing — worth reading the sibling article on post-harvest environment for that stage, as the extraction strategy changes once plants come down.
Related products
Azarius stocks grow tents, inline fans, and carbon filters alongside cannabis seeds from breeders including Dutch Passion, Paradise Seeds, and Royal Queen Seeds. To buy a complete setup, match a 150mm inline fan to a 150mm carbon filter rated at or above the fan's airflow and order the ducting and tape in the same basket so flange sizes line up.
Legal notice: Cannabis cultivation laws vary by country and region and change frequently. This guide is educational. Before growing, verify current laws for your specific jurisdiction. Azarius does not provide legal advice.
This guide is educational horticultural information for adult home growers. It is general guidance only and not professional consultation. Azarius does not provide cultivation advice specific to your jurisdiction.
Last updated: April 2026
Frequently Asked Questions
8 questionsHow do I calculate the right CFM for my grow tent?
How long does a carbon filter last in a grow tent?
Should the carbon filter go inside or outside the tent?
Do I need an intake fan or is passive intake enough?
Why does my tent smell even with a carbon filter?
Does running the fan 24/7 wear out the carbon faster?
What is negative pressure in a grow tent and why does it matter?
How much airflow do I lose when adding ducting and bends to my extraction setup?
About this article


Luke Sholl has been writing about cannabis, cannabinoids, and the broader benefits of nature since 2011, and has personally grown cannabis in home grow tents for more than a decade. That first-hand cultivation experience
This wiki article was drafted with AI assistance and reviewed by Luke Sholl, External contributor since 2026. Editorial oversight by Adam Parsons.
Medical disclaimer. This content is for informational purposes only and does not constitute medical advice. Consult a qualified healthcare provider before use of any substance.
Last reviewed April 24, 2026
References (7)
- [1]Punja, Z. K. (2021). Emerging diseases of Cannabis sativa and sustainable management. Pest Management Science, 77(9), 3857-3870. DOI: 10.1002/ps.6307
- [2]Zheng, Y., Wang, L., & Dixon, M. (2022). An upper canopy temperature threshold for cannabis indoor cultivation. HortScience, 56(12), 1535-1540. DOI: 10.21273/HORTSCI16149-21
- [3]Caplan, D., Dixon, M., & Zheng, Y. (2019). Increasing inflorescence dry weight and cannabinoid content in medical cannabis using controlled drought stress. HortScience, 54(5), 964-969. DOI: 10.21273/HORTSCI13510-18
- [4]Burgel, L., Hartung, J., Schibano, D., & Graeff-Hönninger, S. (2020). Impact of different phytohormones on morphology, yield and cannabinoid content of Cannabis sativa L.. Plants, 9(6), 725. DOI: 10.3390/plants9060725
- [5]Fluence Bioengineering (2023). Cannabis Cultivation Guide: Best Practices for Growing Cannabis with LED Technology. Fluence Technical White Paper. Source
- [6]Craven, C. B., Wawryk, N., Jiang, P., Liu, Z., & Li, X. F. (2019). Pesticides and trace elements in cannabis: Analytical and environmental challenges and opportunities. Journal of Environmental Sciences, 82, 1-9. DOI: 10.1016/j.jes.2019.04.018
- [7]Wartenberg, A. C., Holden, P. A., Bodwitch, H., Parker-Shames, P., Novotny, T., Harmon, T. C., Hart, S. C., Beutel, M., Gilmore, M., Hoh, E., & Butsic, V. (2021). Cannabis and the environment: What science tells us and what we still need to know. Environmental Science & Technology Letters, 8(2), 98-107. DOI: 10.1021/acs.estlett.0c00844